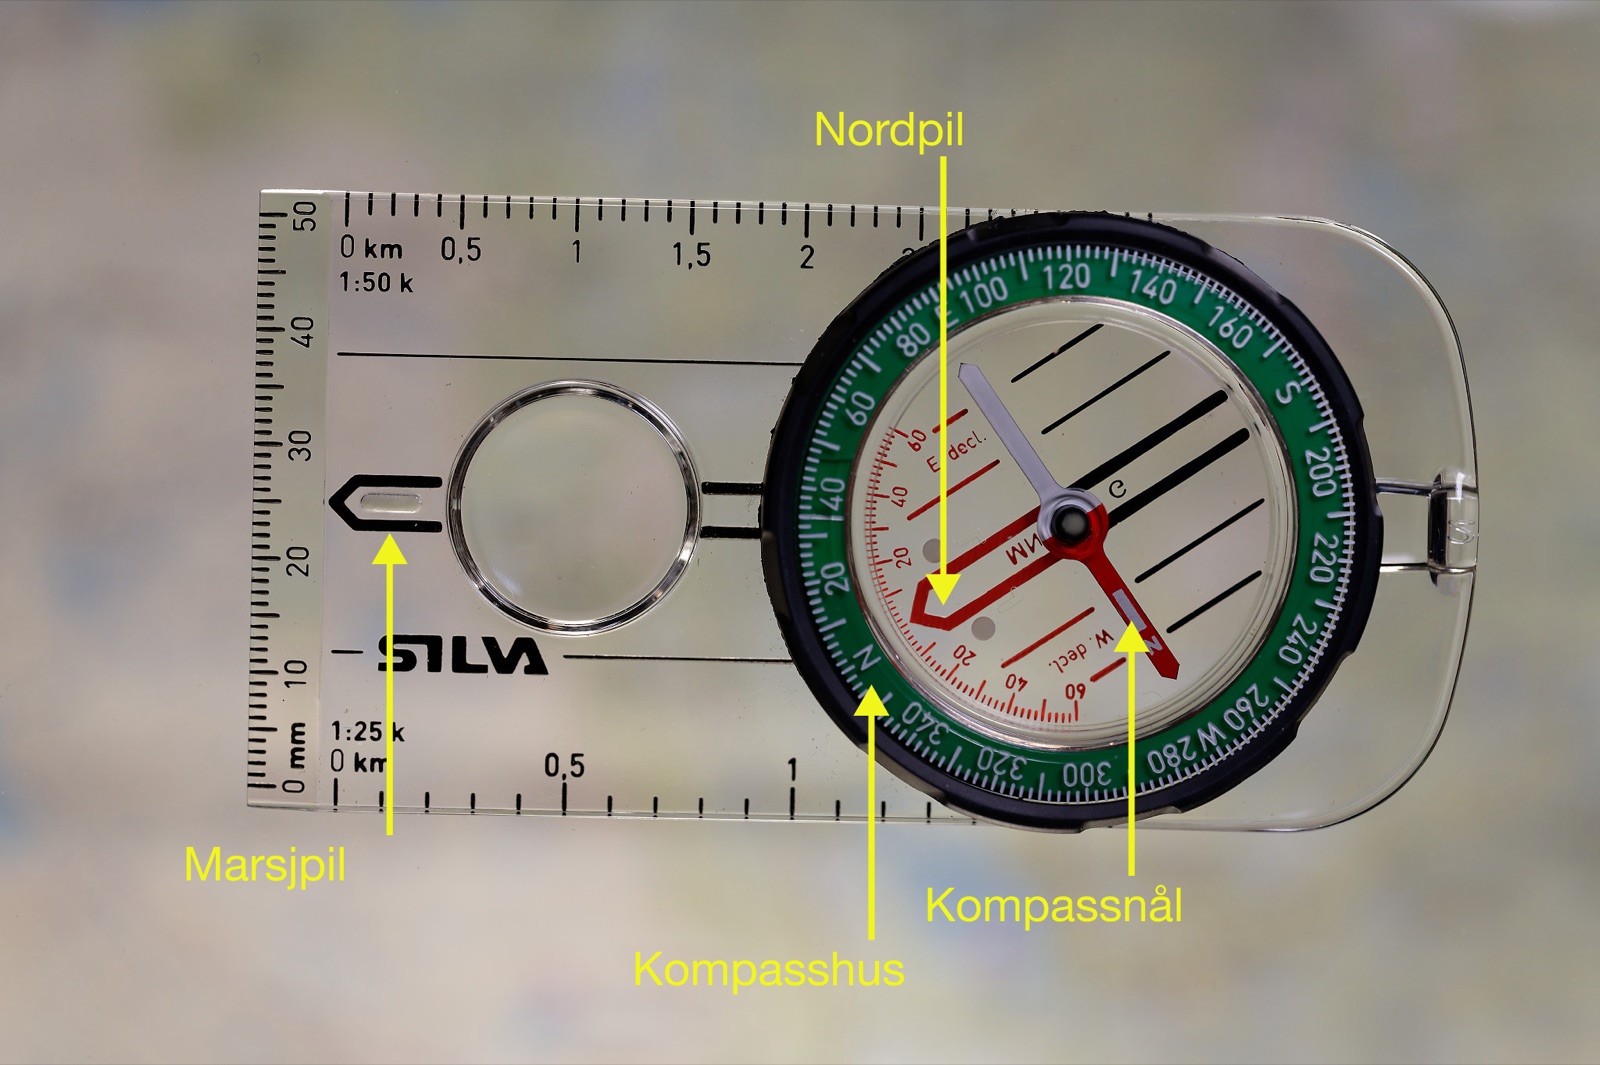
Compass bearing
How to take and walk a compass bearing with compass and map — from the parallel lines in the compass housing to a sighting point in the terrain. With film and practical tips.
39 articles
Navigation is about knowing where you are and where you are going. On familiar paths it happens by itself — you know the bends and the stones. The interesting part begins when you move off the path, when the fog settles in, or when snow covers the landmarks you would otherwise look for. That is when map and compass tell you where you stand and where to go next. GPS is fine as a supplement, but no substitute for being able to read a map and use a compass.
A hiking map is a scaled-down drawing of the terrain — a precise 2D representation in which every line, every symbol and every colour means something concrete. The scale tells you how much reality has been reduced. On Kartverket’s standard hiking map the scale is 1:50 000 — 1 cm on the map is 500 metres in the terrain. On more detailed orienteering maps it can be 1:25 000.
The contour lines (the brown lines) show the difference in height across the terrain. Tightly packed lines = steep; widely spread = gentle. The distance between each line is called the contour interval and is typically 20 metres on Norwegian 1:50 000 maps, 5–10 metres on 1:25 000.
The colours follow a convention that almost all Norwegian maps use:
Learn to pick out leading lines (terrain features that are easy to follow — water, rivers, ridges, clear paths) and catching features (familiar markers — a path junction, a peak, a cliff). Together they let you move through unfamiliar country without losing your bearings.
The compass has one job: to show where magnetic north is. There are two main types:
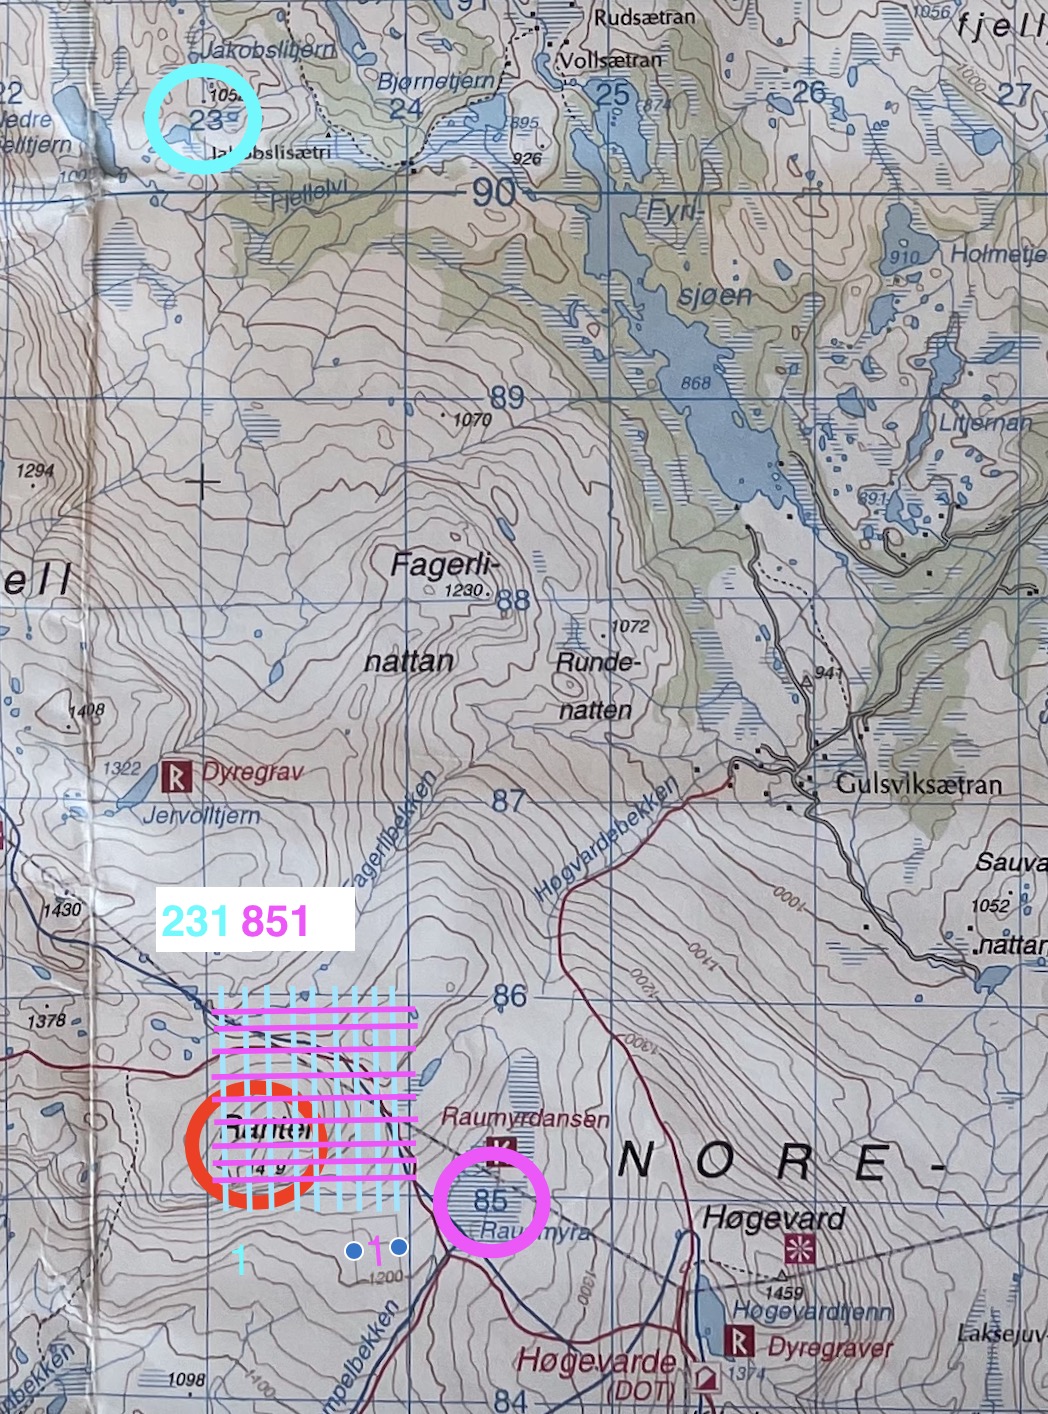
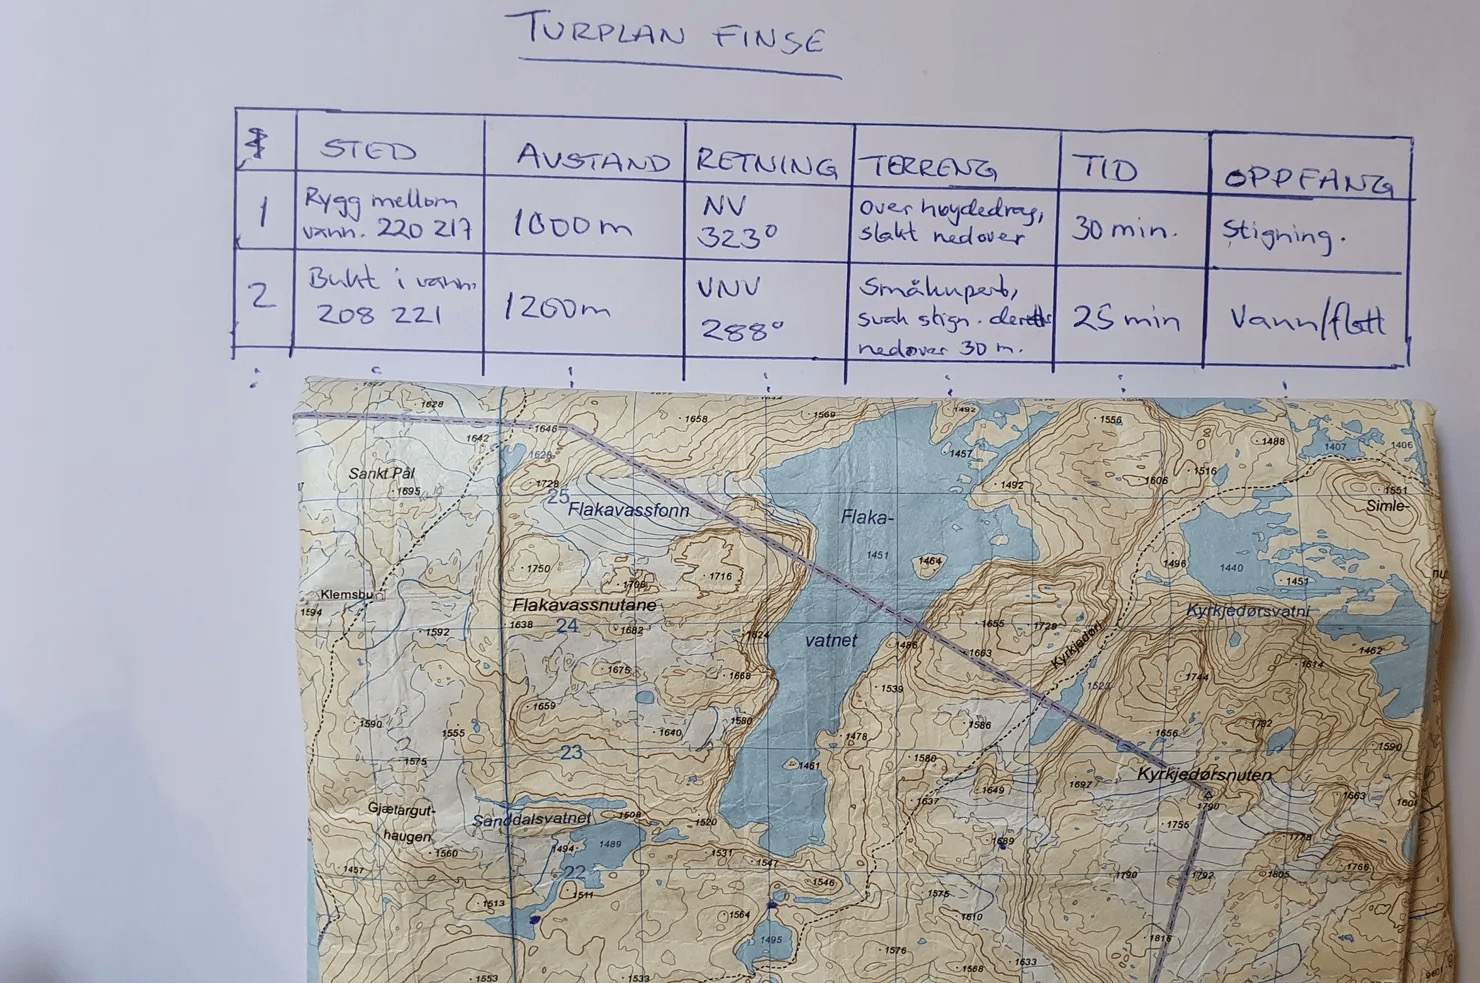
The compass is useful in at least three ways: orienting the map (lay the compass on top, turn the map until the compass needle points to map north — now map and terrain agree), taking a bearing (read the course between two points on the map, walk it in the terrain), and cross-bearing to establish where you are by taking bearings on two known landmarks.
More on taking a bearing → · Map, compass and map case →
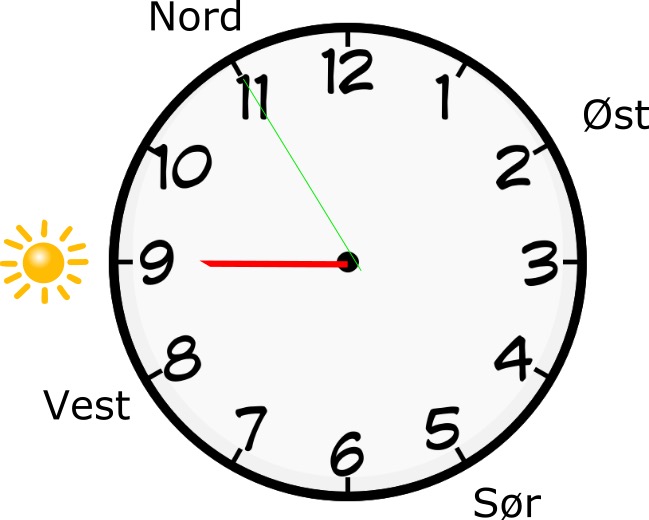
Magnetic north (what the compass points to) and geographic north (what the map grid points to) are not the same point. The difference is called magnetic variation and varies in Norway from ~3° in the south to ~10° in Finnmark. It also changes over time (~0.1° per year). For accurate map work you have to adjust — modern baseplate compasses have a declination adjustment where you can set the local variation in permanently.
Practical habits that make a difference:
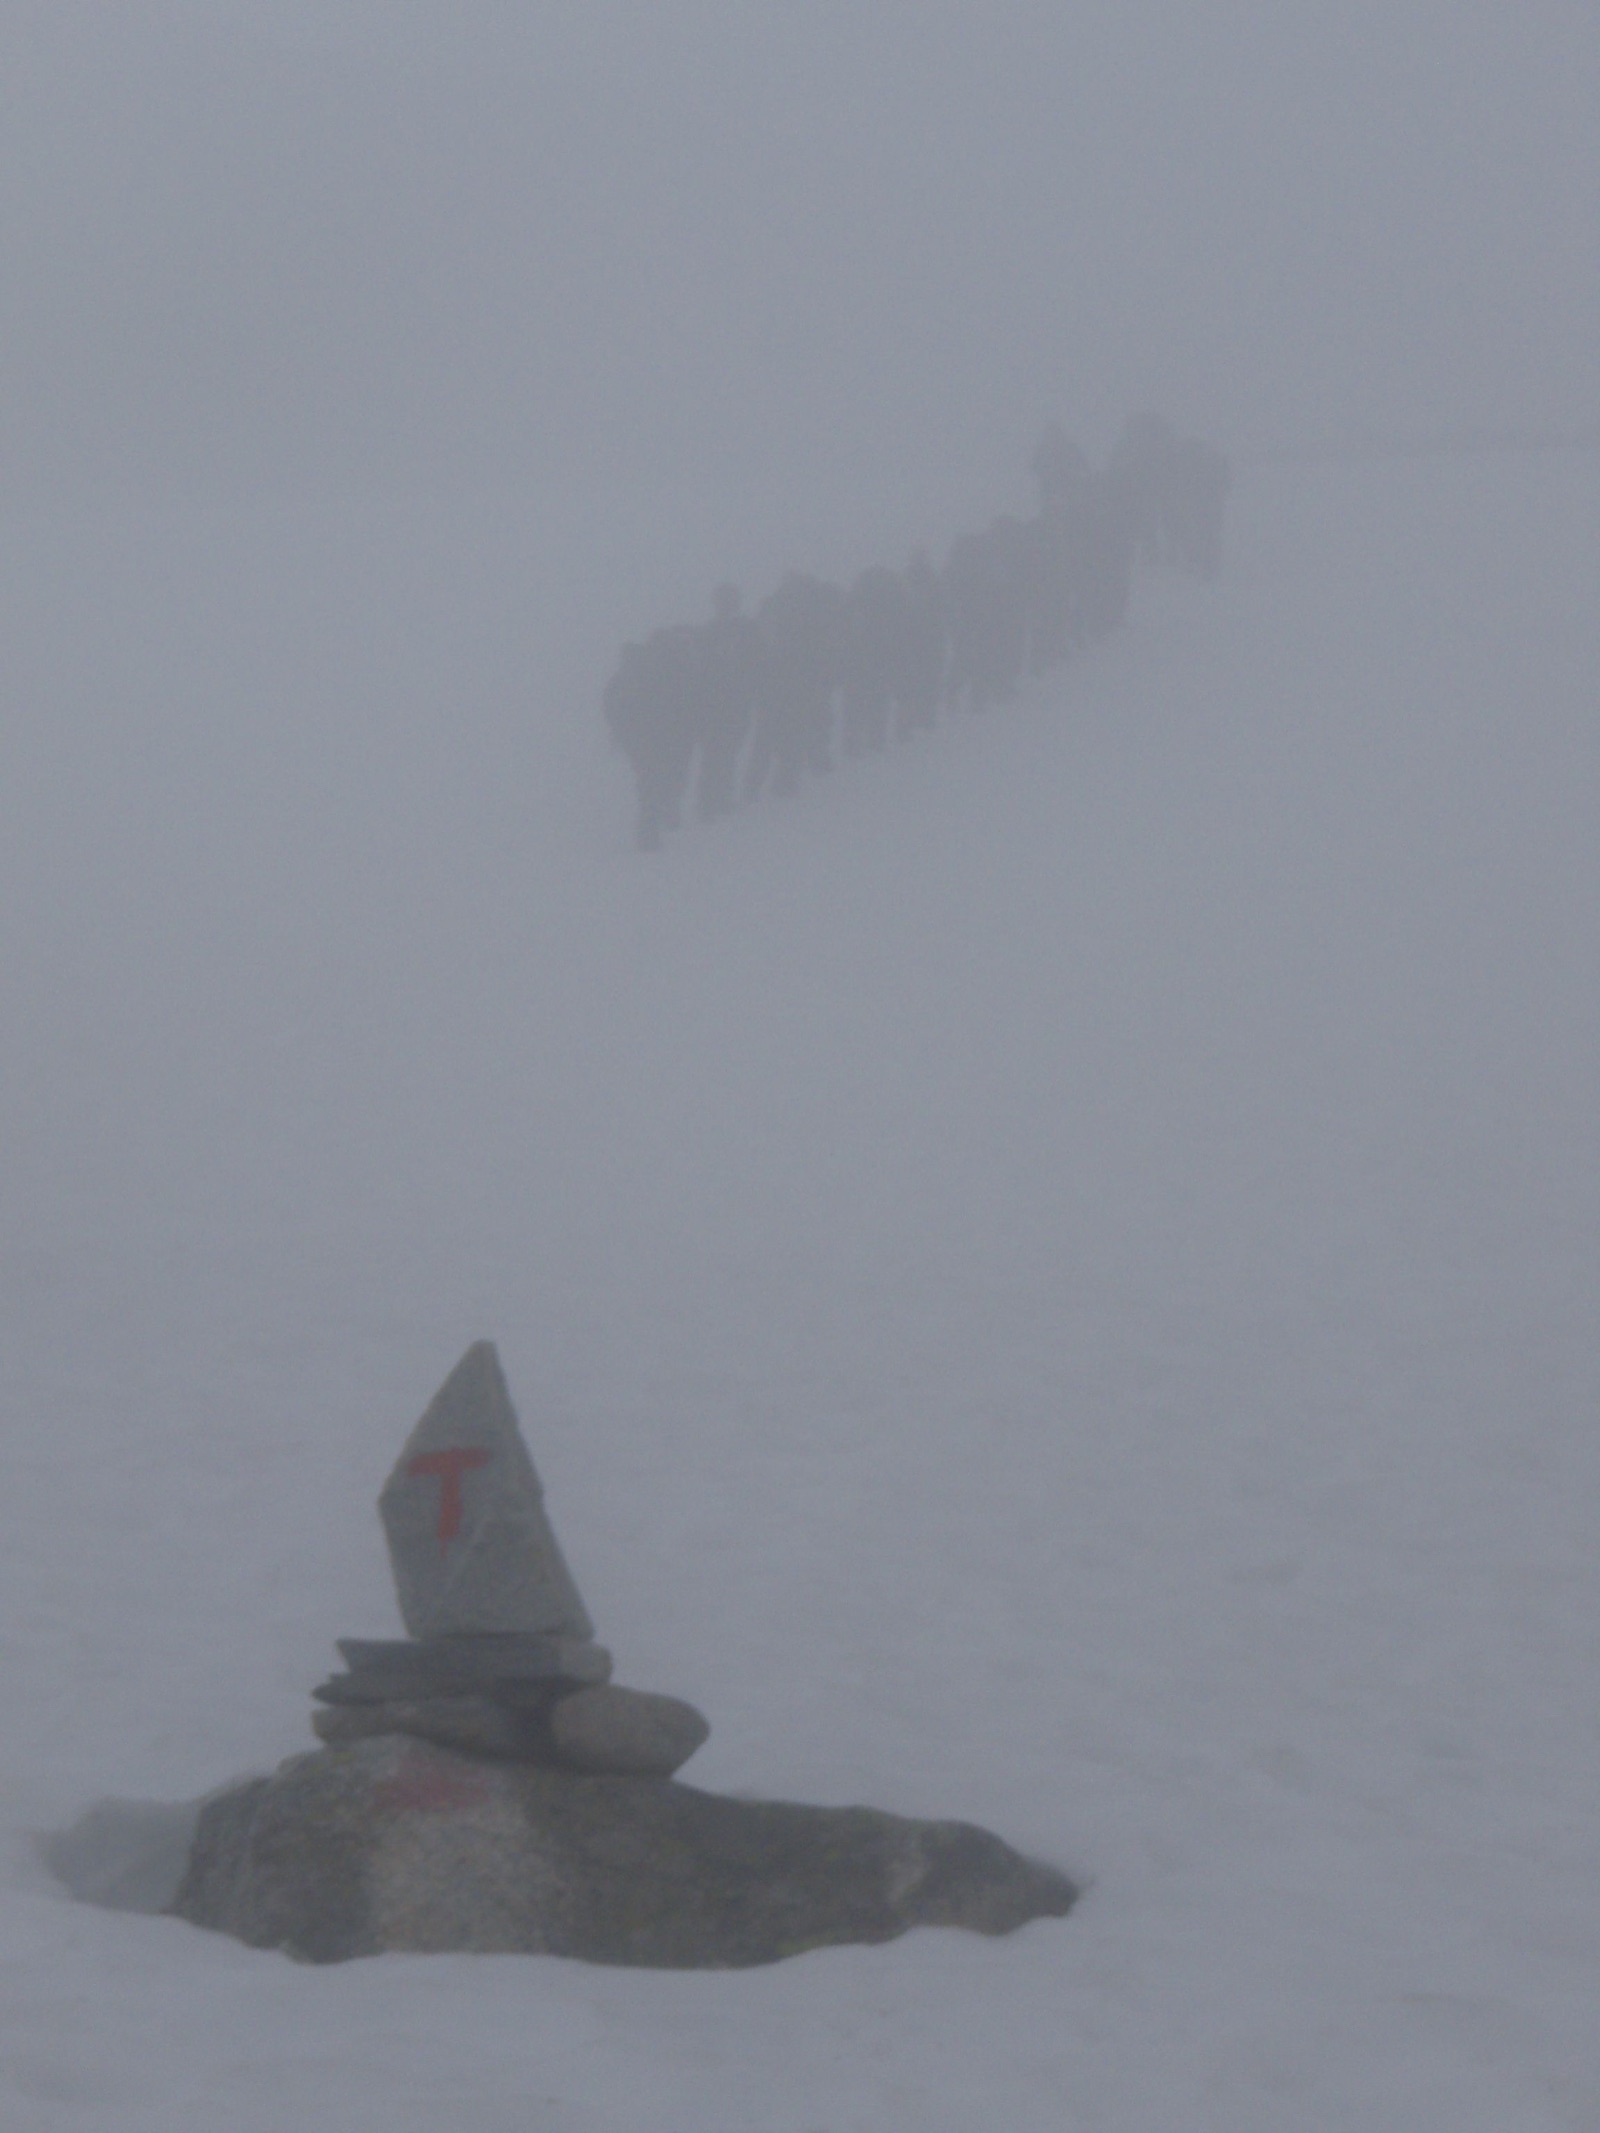
In winter, path markings and small paths disappear under the snow. Leading lines such as rivers and ridges become even more important. Many people who are confident with a map in summer discover how much they have leaned on the path markings only when the snow falls.
Navigation in the winter mountains →
An altimeter is a barometer calibrated in metres — together with the map’s contour lines it is a useful check point. If you are standing at a known height and the altimeter shows something else, you adjust it. In changing weather, calibration is needed several times a day, because the air pressure changes. Many outdoor watches have a built-in altimeter.
GPS is a supplement, not a substitute. It is handy for confirming position or logging a route. It is vulnerable to battery drain in the cold, poor reception below crags, and errors in the map data. Learn map and compass first; use GPS as an extra eye.
Norwegian hiking maps use around 50–80 distinct map symbols to show paths, buildings, water sources, path markers, power lines, cultural heritage sites. Check the legend on the back of the map (or the side) before you start using a new map series — the symbols vary somewhat between Kartverket, Norgeskart, and commercial hiking-map providers.
At /en/kategori/navigation/ you will find detailed explanations of individual symbols (stream, bridge, dam, ridge, summit, contour lines, and more).
To become confident with map and compass:
Text: Gina Wigestrand, Snuitide (2021), revised 2026. The sections on magnetic variation, cross-bearing and altimeter are based on Lars Christian Unger, Turlederboka (DNT, 2010). The section on navigation by nature’s signs: Bjørn Henrik Stavdal Johansen.
External resources: Kartverket — learn map and compass · Norgeskart · NDLA — using map and compass
How to take and walk a compass bearing with compass and map — from the parallel lines in the compass housing to a sighting point in the terrain. With film and practical tips.

How to read the scale and contour lines on a topographic hiking map — from 1:100 000 (planning) to 1:10 000 (orienteering). Distance, terrain and how much detail you actually see.
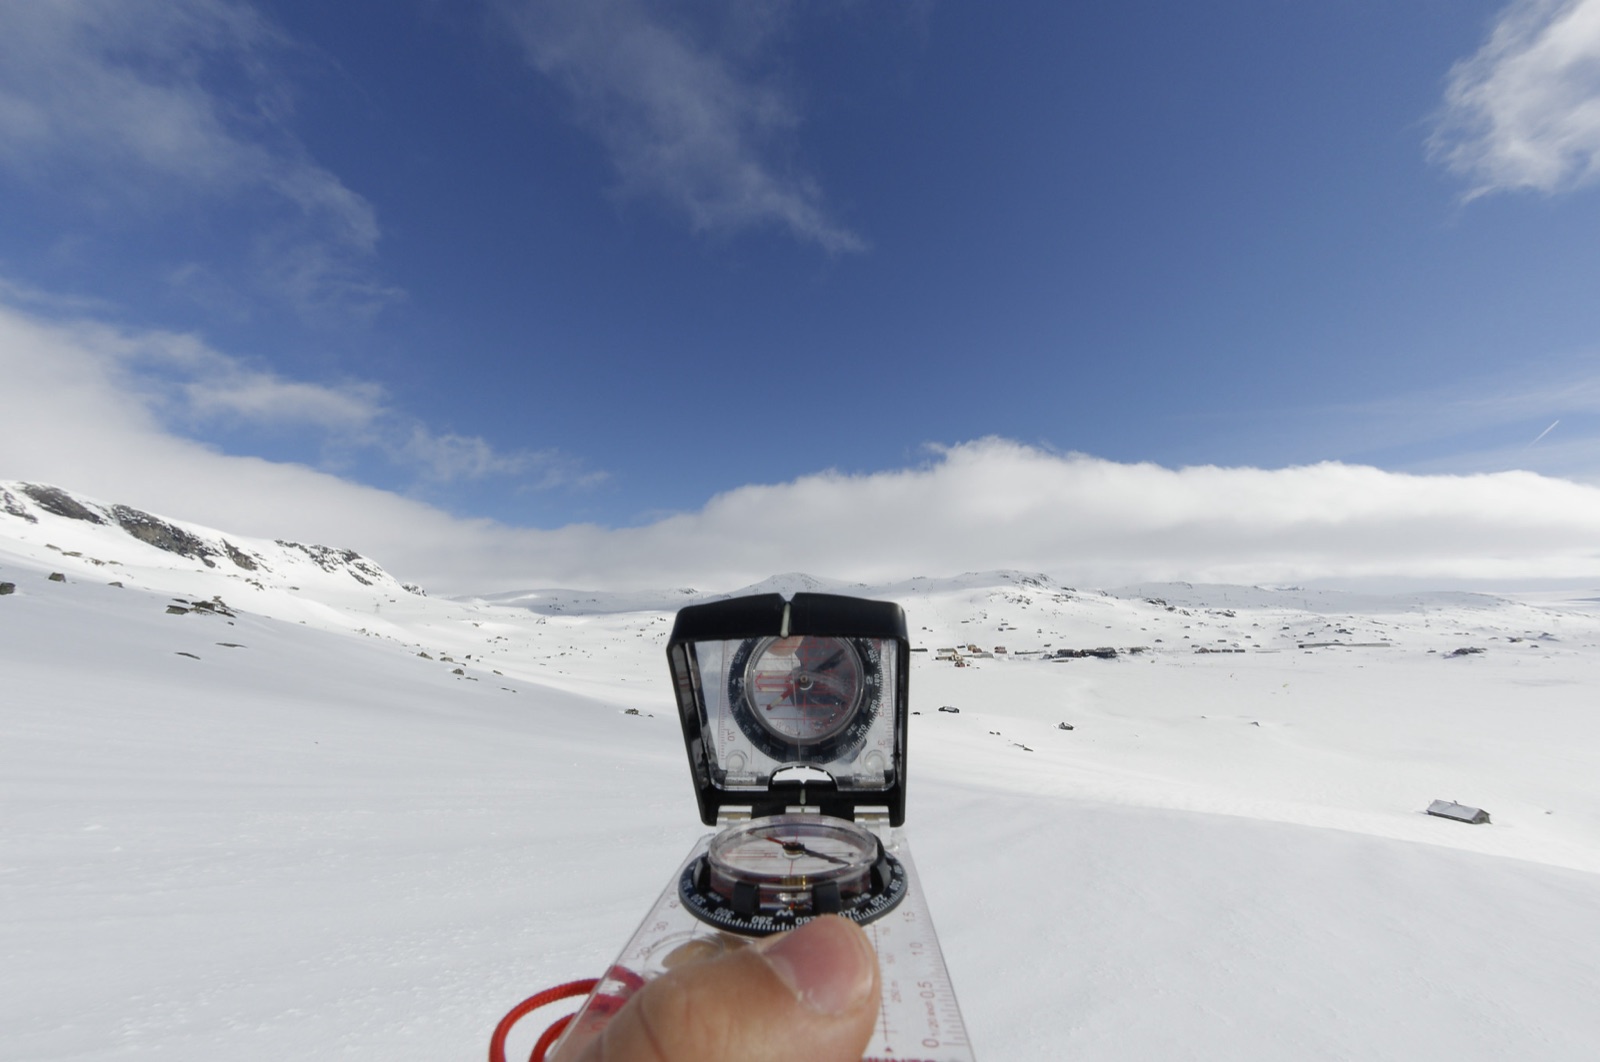
Cross-bearing is the technique for working out exactly where you are on the map — by taking a bearing on two or three known points with a compass. It requires that you have visibility.
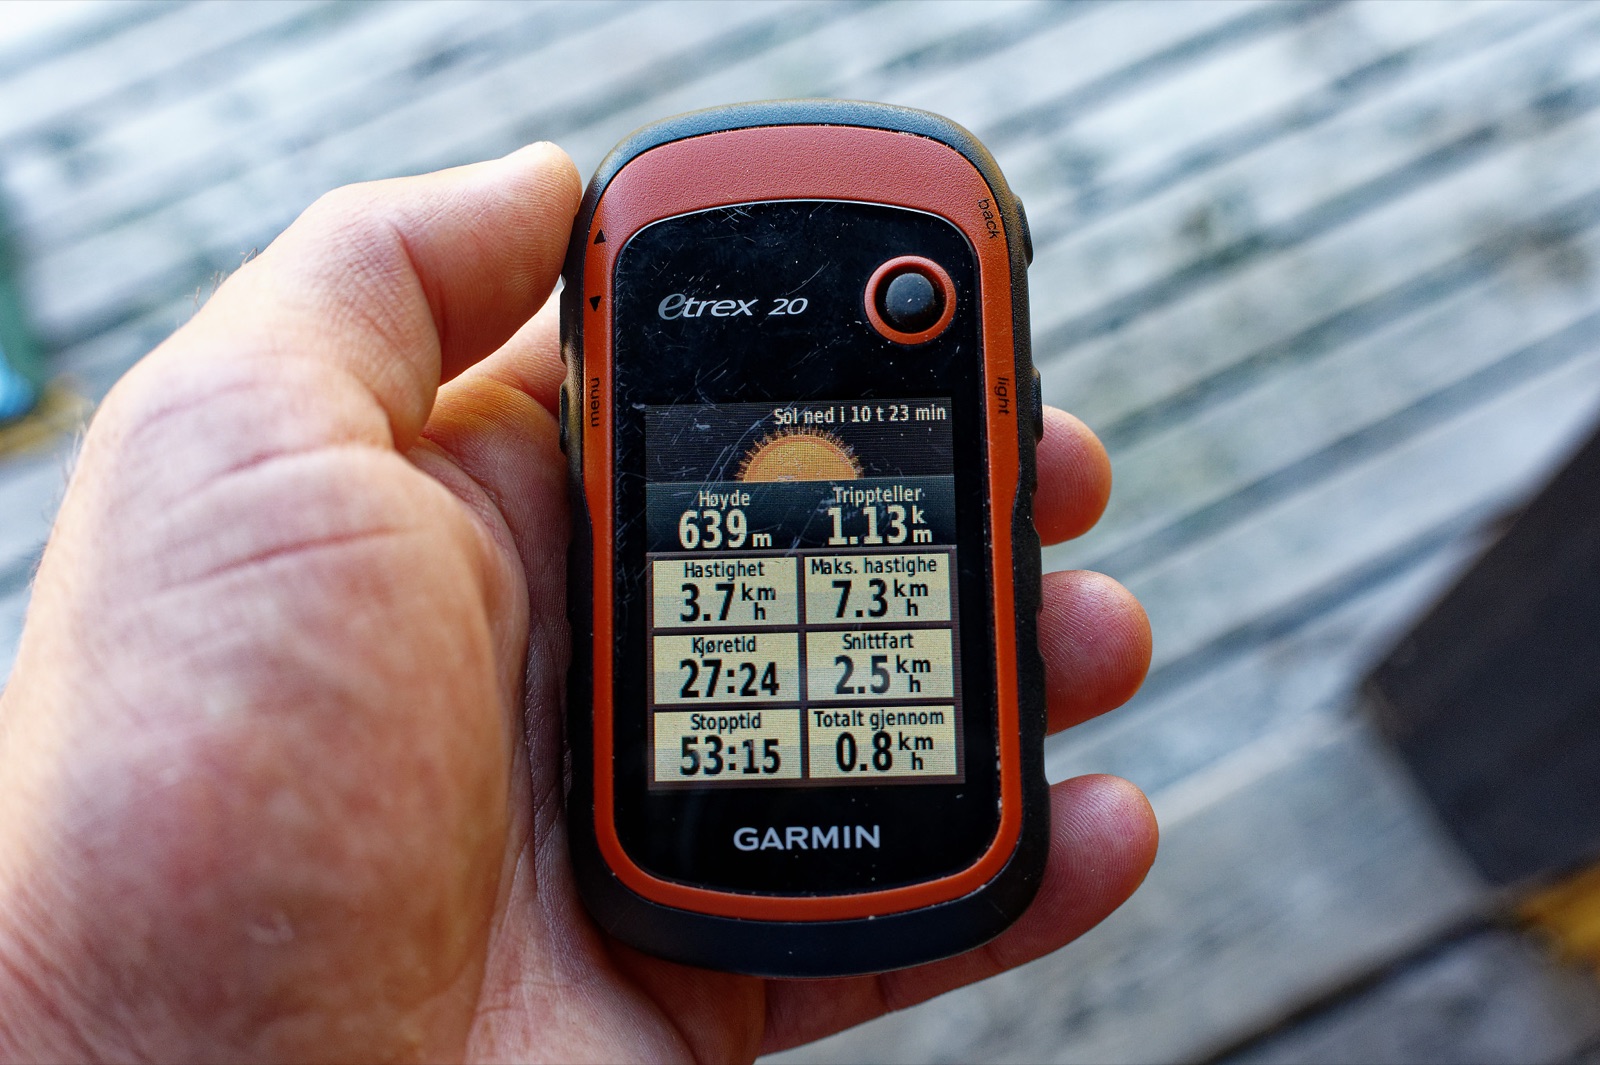
GPS is a useful supplement to map and compass, but it does not replace them. Learn to use a GPS on a tur.
How to read a six-figure grid reference from the UTM grid, and how to give your position precisely whether you are calling 113 or sharing a trip tip with a friend.

The difference between the map's north and the compass needle's north. How to correct for magnetic variation when taking a compass bearing — especially important in Troms, Finnmark and on Svalbard.
Although you should always carry a map and compass, sometimes you find yourself out in nature without either.
How to read a nautical chart, fix your position using latitude and longitude, and take a course with a parallel rule. With a paddling-speed table, free school charts and practical resources.
Sometimes it is especially good to find the hytte. From Hurrungane in January.
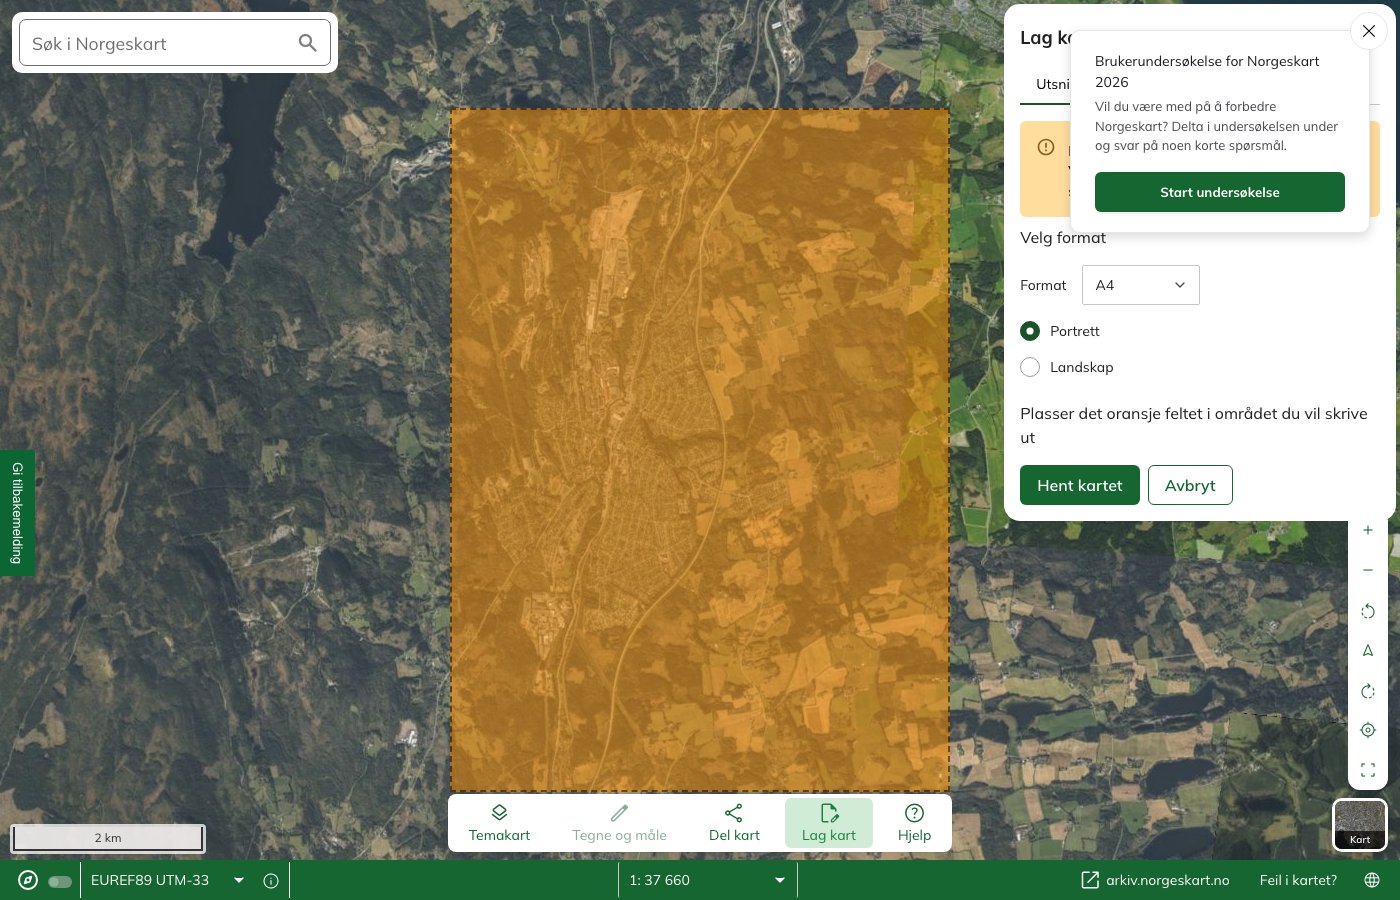
How to print your own hiking map from norgeskart.no or kartmannen.no — with a UTM grid, your own route and an optional scale.
29 entries