Campfire
Cooking on an open fire
A pagodebål is the best for cooking — the fire is stable, pots can be set straight on top, and the embers give precise heat. Fire types, recipes and practical tips.
An open fire is a practical heat source when you are cooking for many people. It also gives warmth and cosiness to everyone seated around it. A fire gives plenty of heat and lets you adjust that heat by placing pots and pans at different distances from it. The best heat comes from the embers. You can hang the pot from a stick over the fire and adjust the distance and heat that way — or use a grill grate or a flat stone as a frying surface over the fire.
The drawback of an open fire is that you need access to firewood and a suitable spot, and you have to consider fire risk. Check the local fire rules and the fire ban before you light it.
Fire types for cooking
Different fire types suit different cooking tasks:
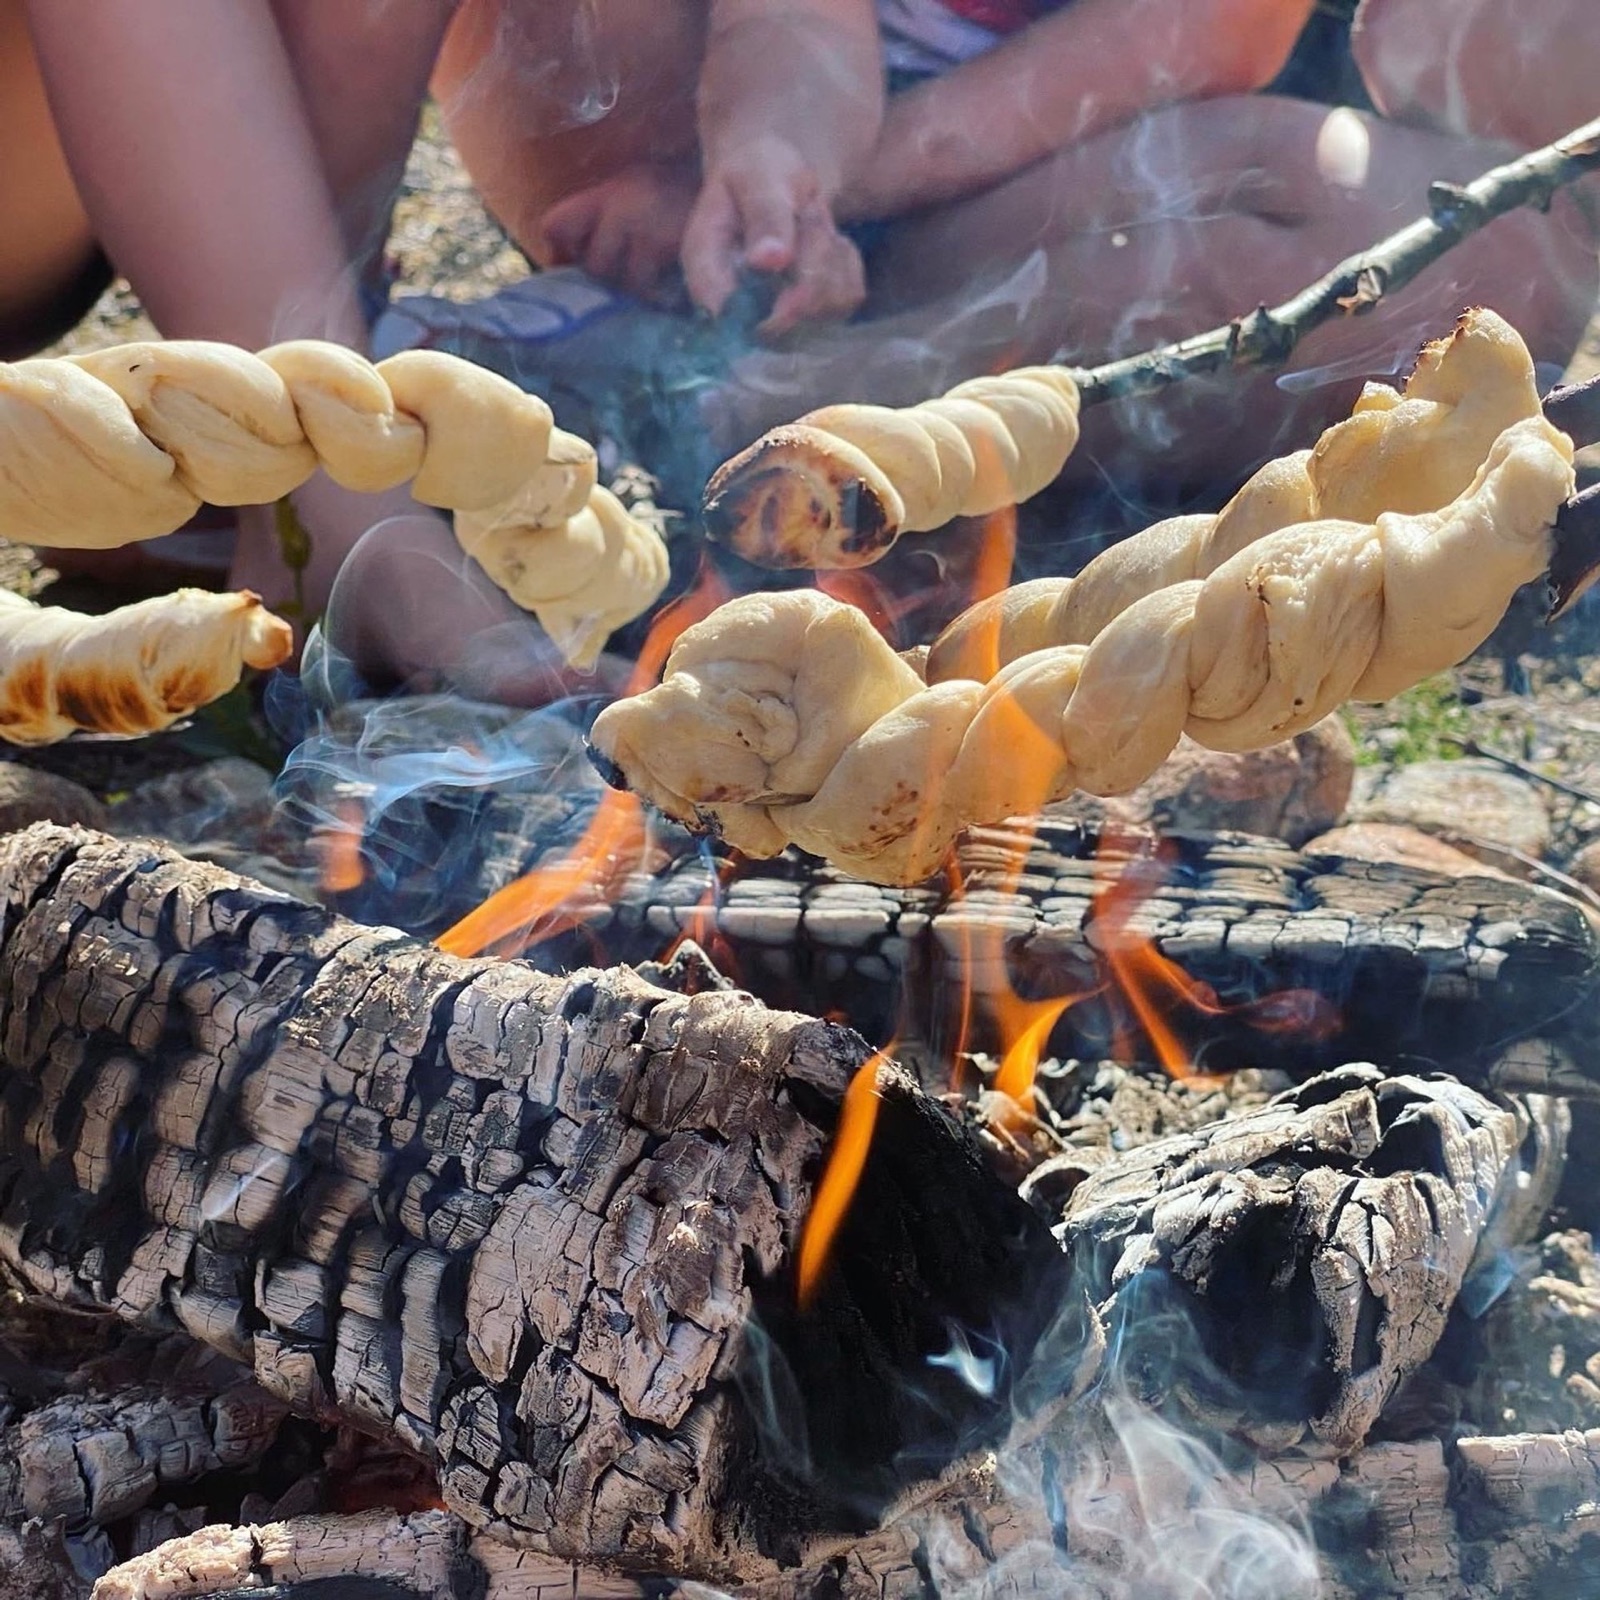
Pagodebål
A fine fire for outings and easy to build. It resembles an Asian pagoda temple — hence the name. It burns fast and hard, and suits the job of having a large fire pot with food for many people (a whole school class, for example).
How to build it: Lay two large logs parallel at the bottom, about 20 cm apart. On top of them, lay two new logs crossways. Carry on for a couple of layers. Inside the ‘pagoda’ you stand smaller splints of wood on end, ideally in a pyramid with the tinder innermost.
Kubben (finskeprimus)
An old Sea Sámi or Finnish fire type. Excellent on driftwood from the shore, but it works on logs of all kinds. You set kettles and pots on top of the kubben — you boil as easily as on an ordinary cooker. It can burn for around a day. It calls for a good saw and a completely dry log.
How to build it: Use a log that is ideally 30 cm thick or more, one to one and a half metres long. Stand the log on end. Cut a cross in the top, 30–50 cm down into the log. Cut several more cuts of the same depth so that it forms a star shape. Easiest to light: pour a little firelighter fluid down into the crack and set it going. Alternatively, make a small hollow in the centre and light it there. The heat burns its way downwards.
Cooking pit
A very old cooking method for the long, slow roasting of meat. Remember to get permission from the landowner before you dig (Bjerke, 2016).
How to build it:
- Dig a pit
- Put sand or stone in the bottom
- Light a fire and burn it well — bring enough firewood
- Add round stones and let them sit there for at least an hour
- Wrap the meat in at least 4 layers of heavy-duty aluminium foil
- Take the stones out, lay the meat down into the pit, and put the stones back over the meat. Use thick gloves — the stones are scorching hot
- Lay turf and soil on top, making sure it is completely sealed
- The meat must roast for 2.5–4 hours depending on its size
The hunter’s fire
A fine cooking fire using the tripod principle.
How to build it: Find three stones of equal size and stable, or sturdy logs. Set them in a triangle formation so that a pot can be placed on top. If you are using logs, they should stand on end. Light a small fire in the middle with dry twigs, laying the sticks horizontally between the stones. The sticks are best splintered up a little with the knife to catch fire more easily.
The star fire
A small cooking fire you can use where you have no stones or tripod available.
How to build it: Lay five to six logs in a star formation. Light a small fire in the middle. Once the fire has properly caught, you can set a kettle in the centre. As the logs burn down, you push them inwards towards the middle.
The seven-stone oven — for baking on a tour
With a seven-stone oven you can bake rolls out on a tour!
How to build it: Build an oven from a minimum of 7 stones so that you get a firing chamber at the bottom and a baking oven above. Make walls and a roof of stone, and place a flat stone as a baking slab in the middle. Light a fire in both the upper and lower chamber, and let it burn for a while. Scrape out the remains of the fire in the upper chamber and place whatever you are baking there. There may well be embers left in the lower chamber (Bjerke, 2016).
Tip: You can lay whatever you are baking on a lid over a few sticks to keep it from getting scorched underneath before it is done.
Recipes — food on an open fire
Snuitide’s selection of simple open-fire recipes (all of difficulty easy):
- Cabbage phad thai — dinner, vegetarian
- Pinnebrød — lunch, classic
- Campfire pizza — dinner
- Pancakes — breakfast/lunch/dinner/dessert, vegetarian
- Toasted cheese sandwich — breakfast/lunch
- Feta pasta — dinner, vegetarian
- Pizza swirls — breakfast/lunch/dinner, vegetarian
- Taco soup — lunch/dinner, vegan
- Tortilla wraps — lunch/dinner
- Fast food from the fells — dinner
- Wok on the fire — dinner
More resources
- Turmat.no
- Mat på bål — Eventyrgutten
- Fem tips til god og enkel mat på bål — Norsk Friluftsliv
- Utemat.no
- Mat på bål — KM-speiderne
Learn more
Find firewood and a suitable fire site · Fire types · The open-fire ban, 15 April – 15 September · Food on a tour
Text: Hilde Grøtte, Snuitide (2022), revised 2026.
Sources: Bjerke, T. (2016). Bål — Den ultimate boka om bålbrenning. Stavanger Turistforening (2021). Pagodebål [Video clip]. https://www.youtube.com/watch?v=YGeQNLUrwps