Avalanches
Terrain
To keep a safe distance from potential avalanches, you need to be able to recognise avalanche terrain.
Contents
To keep a safe distance from potential avalanches, you need to be able to recognise avalanche terrain.
Avalanche terrain.
Terrain class 0 – terrain that normally has no avalanche terrain.
Image 6: Example of terrain class 0. Photo: Varsom.no
This is flat or gently sloping terrain. There may be small slopes and formations, but normally neither run-out zones nor release areas for avalanches. Note that even though this is not avalanche terrain, it can be terrain that is demanding to assess with regard to other hazards. Particularly with regard to wrong navigation in poor weather, since we can navigate into avalanche terrain, or travel on water and/or rivers that are open, regulated and/or not frozen over.
Terrain class 0 is therefore well suited to cross-country trips, with or without overnight stays, for large groups (school classes).
- Recommended skills for travel in terrain class 0:
- General winter friluftsliv skills
- Recognising where there is no avalanche terrain
Terrain class 1 – terrain that is mostly gentle and easy to read.
Image 7: Example of terrain class 1. Photo: Varsom.no
You will have to deal with run-out zones and possible terrain traps, while release areas can be avoided. Based on the terrain, there will be considerable room for choice when it comes to route selection. Terrain class 1 is therefore well suited to nordic trips or alpine ski touring/topptur. The terrain invites good skiing and is a sensible terrain choice if you do not have much knowledge of assessing the snowpack or if there is high avalanche danger. Terrain class 1 is usually not suited to very large groups (more than 10 people).
- Recommended skills for travel in terrain class 1:
- Being able to use the avalanche forecast
- Companion rescue
- Recognising avalanche terrain
- General winter friluftsliv skills
We have already touched on a number of terms that can be a little hard to grasp. We will go on to focus on the terrain factors of steepness, release and run-out zones, terrain traps, terrain form, forest, route choice and exposure in avalanche terrain.
Steepness
Most avalanches need areas steeper than 30 degrees in order to release.
To assess what counts as terrain steep enough to release an avalanche, we have a range of methods that can be used.
Steepness map
Study the map and work out how steep it is at the various places in the terrain.
[NVE steepness map](https://temakart.nve.no/prosjekt/37164741-bb59-4ae6-8c04-b436fbc9d164/-1745811290)
Image 8: Colour codes for different steepness shown in a thematic map from Varsom (Varsom). Screenshot from a map taken from Varsom.no
When planning a trip, we can use steepness maps on Varsom or RegObs.
Varsom Regobs - en tjeneste fra NVE, i samarbeid med Statens vegvesen og MET
RegObs is also available as an APP on your phone.
The steepness map shows areas steeper than 27 degrees. The areas are marked in green for steepness between 27 and 30 degrees, and in shades from yellow to red for terrain steeper than 30 degrees.
Clinometer
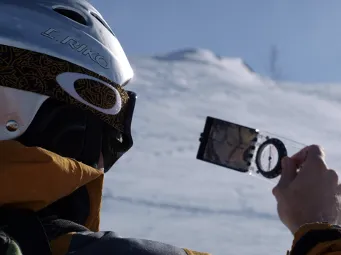
Photo: Linda Hallandvik.
While out on a trip, we can work on how steepness is measured at a distance in the terrain.
We can use a clinometer - a compass with a steepness gauge, a steepness gauge on the ski pole, or an App on the phone, for example: SlopeAngle (Apple) Clinometer (Android)
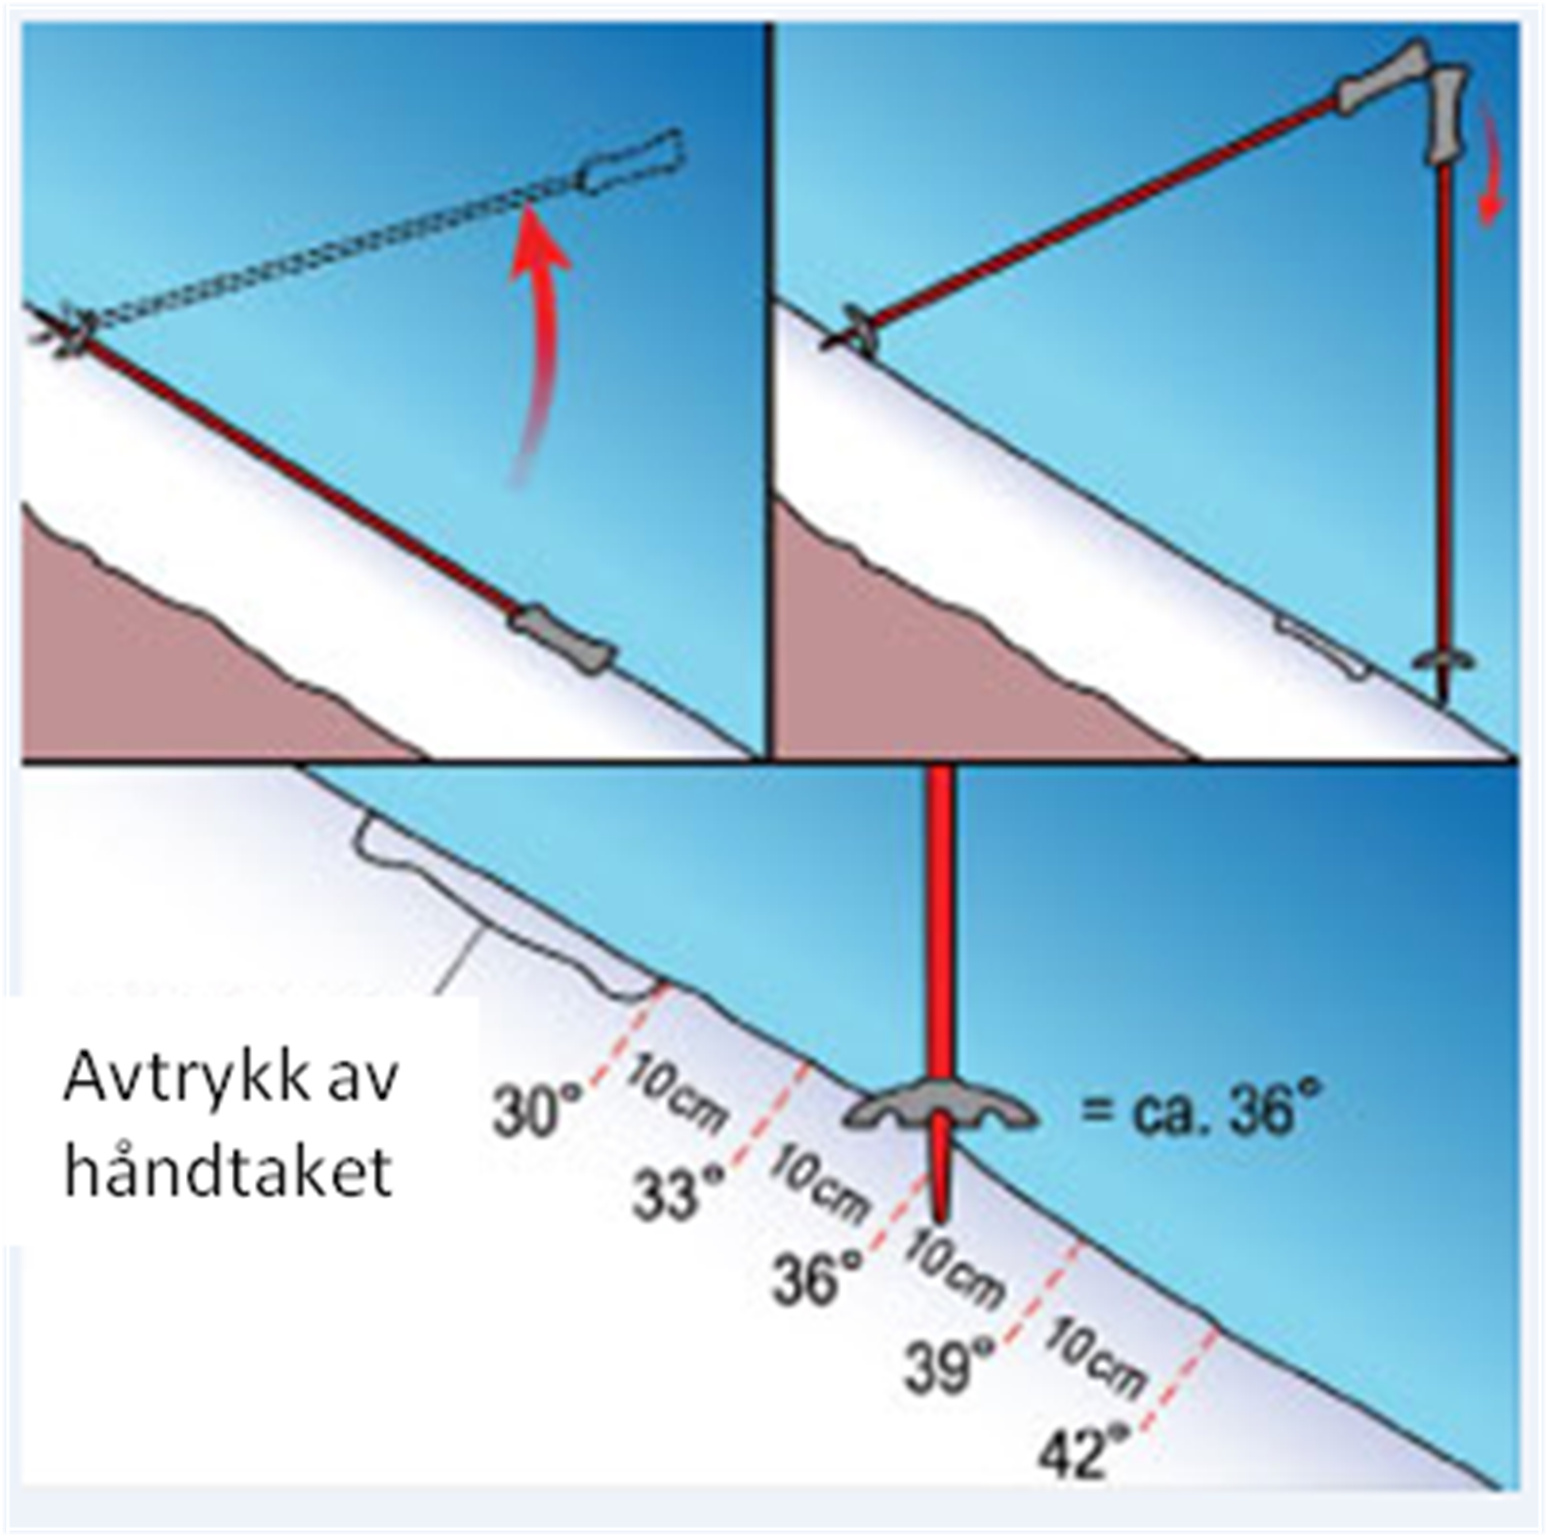
Measuring steepness with poles
We can also measure steepness directly with poles: then we have to stand in the steep terrain, and this should therefore only be tried in terrain where the slope is no more than 5 metres high.
Varsom.no - measuring steepness in the terrain.
Image 10: Shows measuring steepness with poles. Illustration: Varsom.no
It is important that the pole hangs freely - shown in the top images. If 10 cm above the imprint of the handle, it will be 30 degrees minus 3, that is 27 degrees steep. 20 cm above = 24 degrees steep, and so on. The opposite if the imprint is below the handle (Varsom).
Release and run-out zones
[How to keep a safe distance from avalanche terrain - the 1:3 rule. Film: NVE](https://www.youtube.com/watch?app=desktop&v=XOOQN187dsY)
How to keep a safe distance from avalanche terrain - the 1:3 rule. Film: NVE
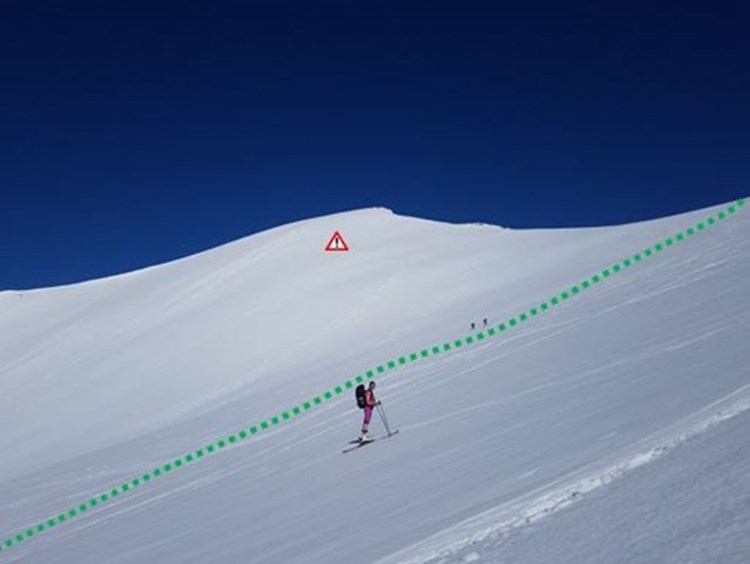
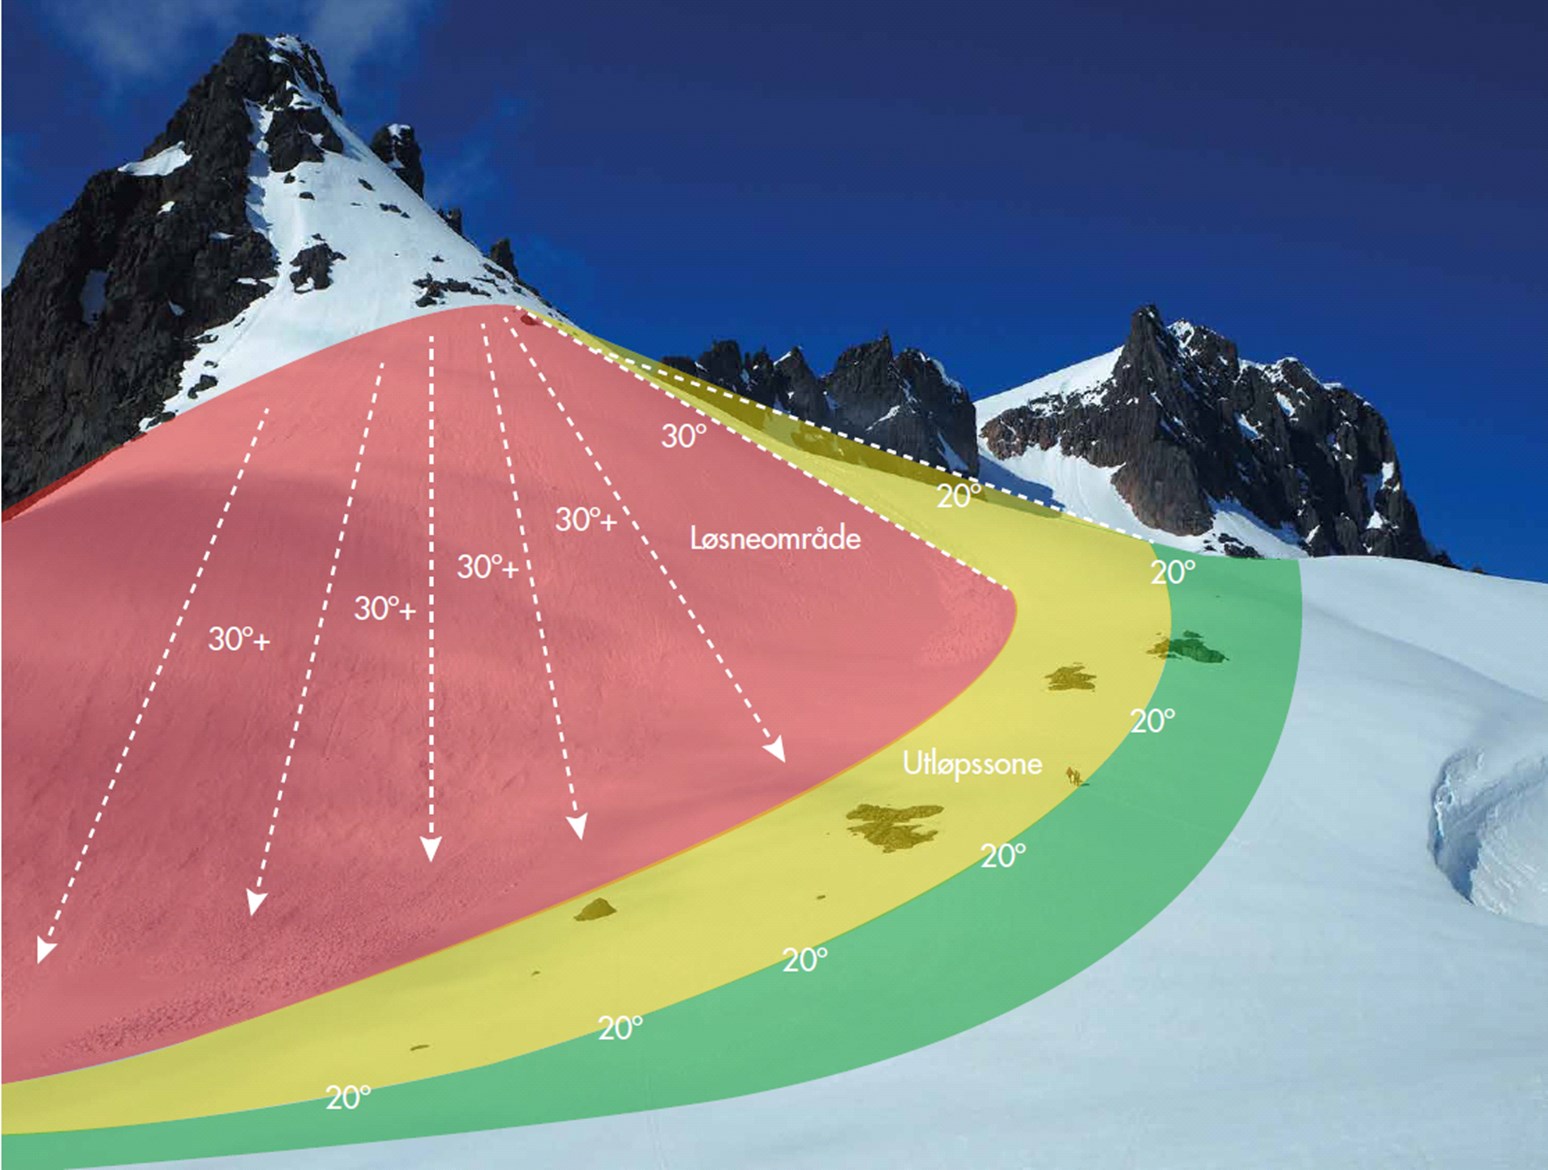
Image 11: The red zone shows terrain steeper than 30 degrees and illustrates where avalanches can release. The yellow zone shows the avalanche’s run-out zone, and the green zone shows where you can travel at a safe distance from a potential avalanche Photo: Varsom.no
Avalanches do not occur where it is flat. The terrain must have snow and be steeper than 30 degrees, the red area in image 11. These are areas where snow can release and cause an avalanche.
The terrain below release areas is the run-out zone for avalanches. Avalanches tend to follow depressions in the terrain and take the path of least resistance. Even though the avalanche releases where it is 30° or steeper, the avalanche itself will reach terrain that is gentler than 30°. The run-out zone for avalanches is just as dangerous to you as the release area.
Both release and run-out zones for avalanches are defined as avalanche terrain.
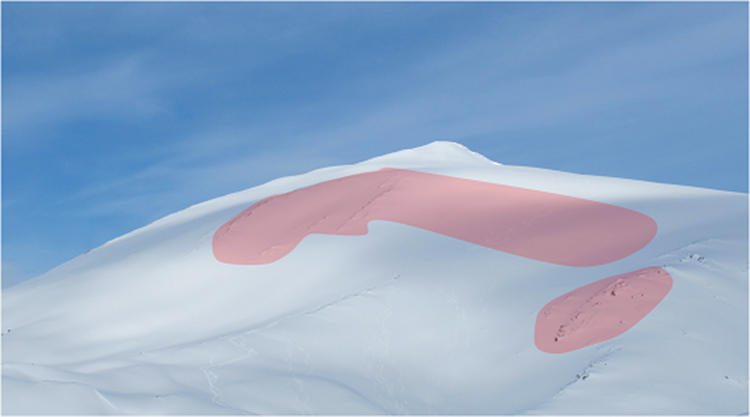
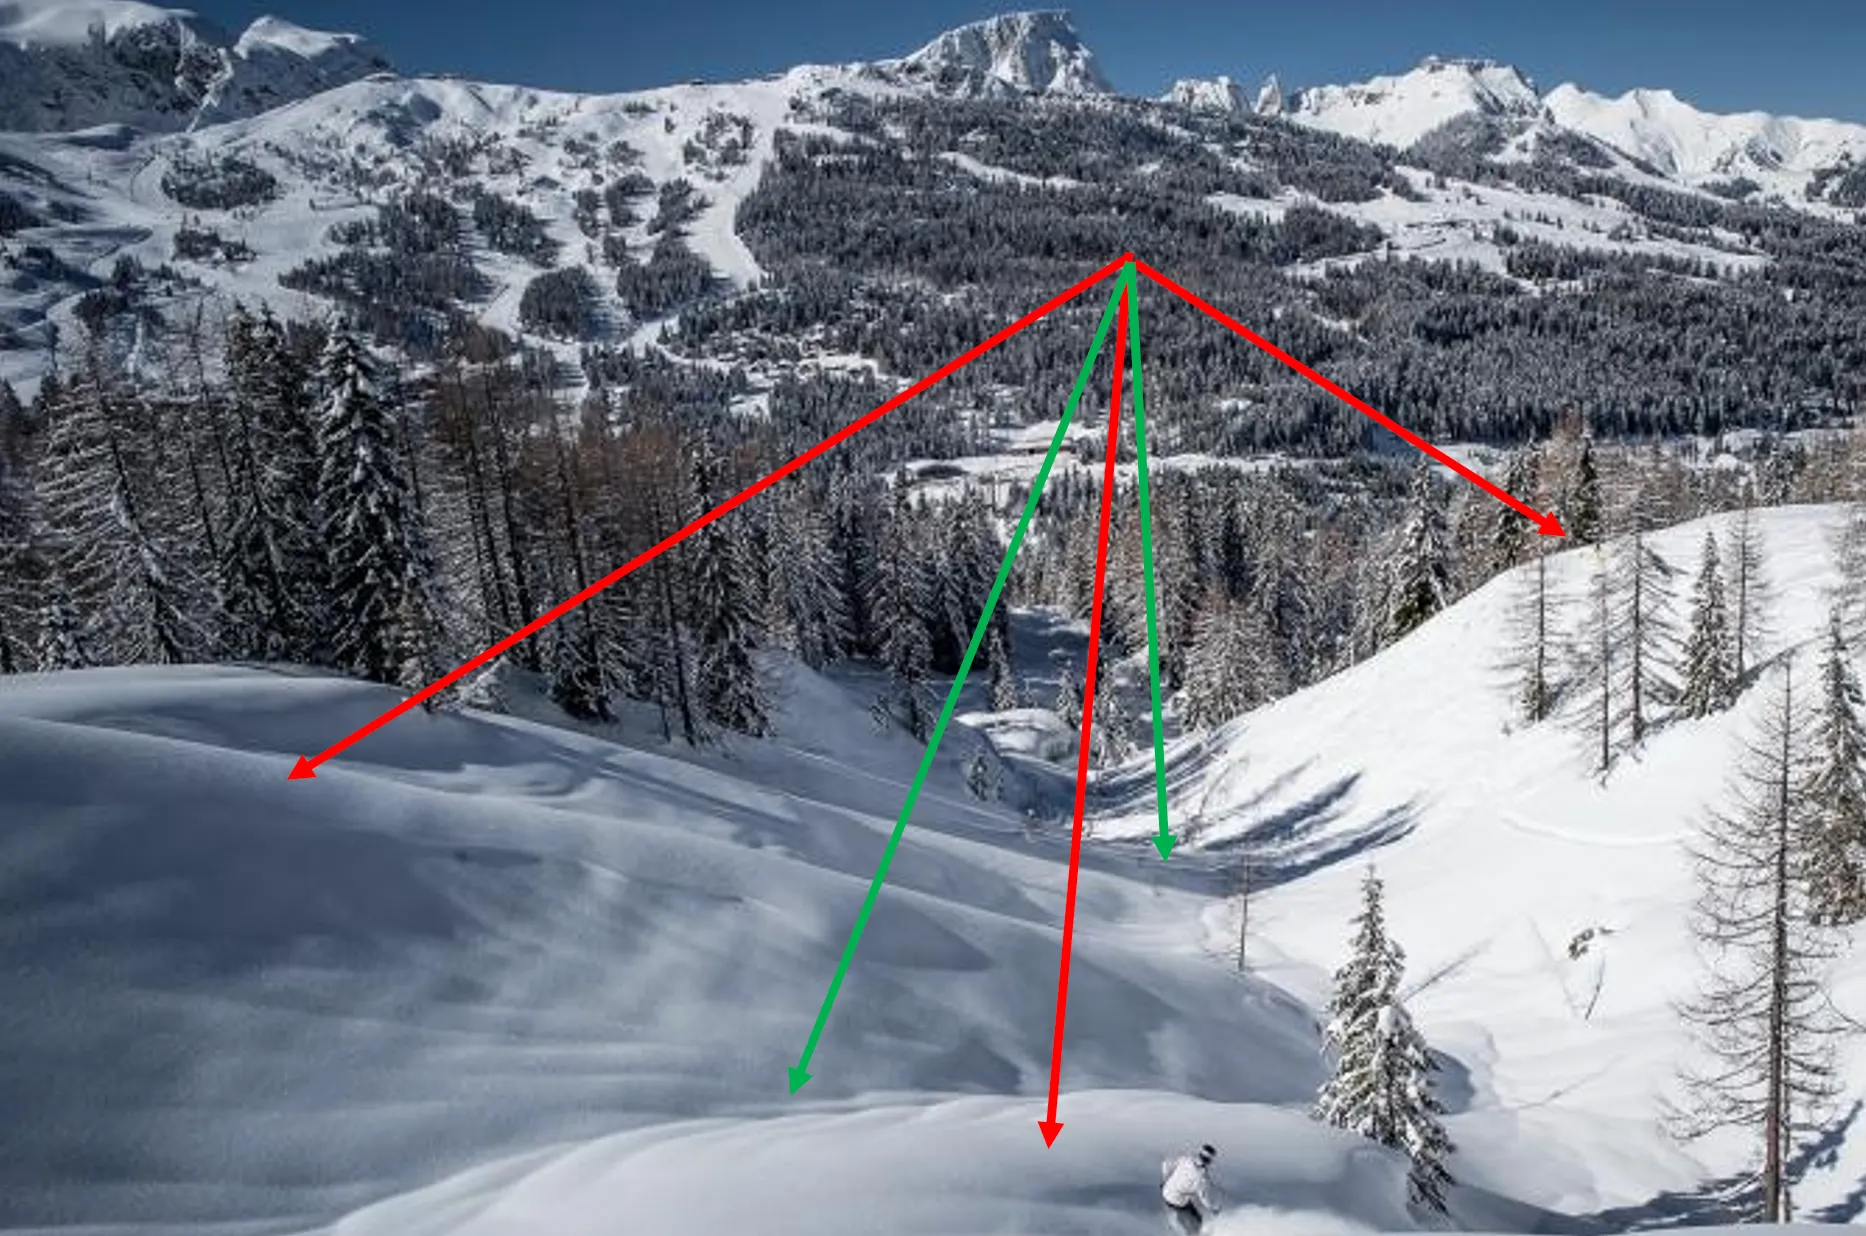
Image 12: Red zones and arrows indicate release areas. Photo: Varsom.no
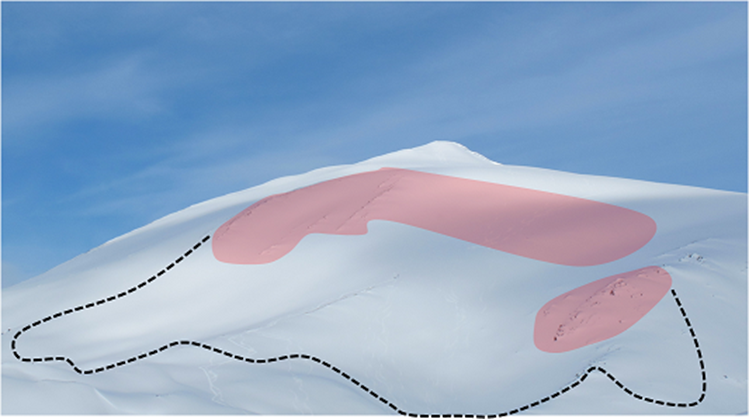
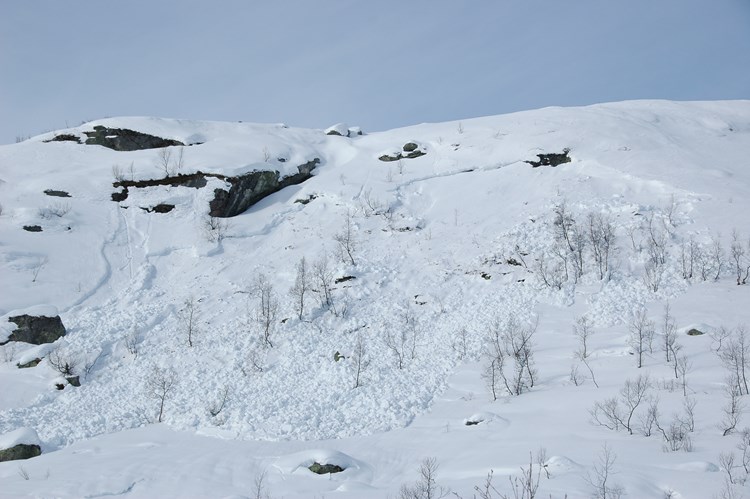
Image 13: Dotted line, example of a run-out zone. Photo: Varsom.no
If an avalanche releases from a 100-metre-high steep slope, the snow will first slide to the bottom, see the release point and fall height in the figure. The avalanche can then slide a further 300 metres horizontal length, that is three times the fall height. The area where the avalanche stops is called the run-out zone. So even when we are travelling on a flat lake, we can be standing in the run-out zone for avalanches.
The three-times rule for avalanches. Illustration: nyhetsgrafikk.no, NTB Scanpix, via NDLA
Image 14: Measuring run-out at a distance. Illustration: Varsom.no
Release areas can be studied on a steepness map before we set out, and they can also be measured with a clinometer if we can see the steepness in profile (at a distance). If, for example, we come into a valley, we can measure the distance from where we stand to any release area. We then sight up towards the release area with the clinometer and read off the number of degrees to where we stand. If this figure shows below 20 degrees, we are at a safe distance should an avalanche release. This is often referred to as the 1:3 rule. That is, by simple means (using the clinometer) we are confident that we are positioned 3 times out from the height of the slope that can release.
Terrain traps
Varsom.no - Avalanche danger and terrain traps
Terrain traps are terrain formations that can increase both the consequence of, and the likelihood of, being caught in an avalanche.
Ask yourself: what is the consequence of being carried away by the snow masses where you are?
Image 15: Image of different types of terrain traps Photo: Varsom.no
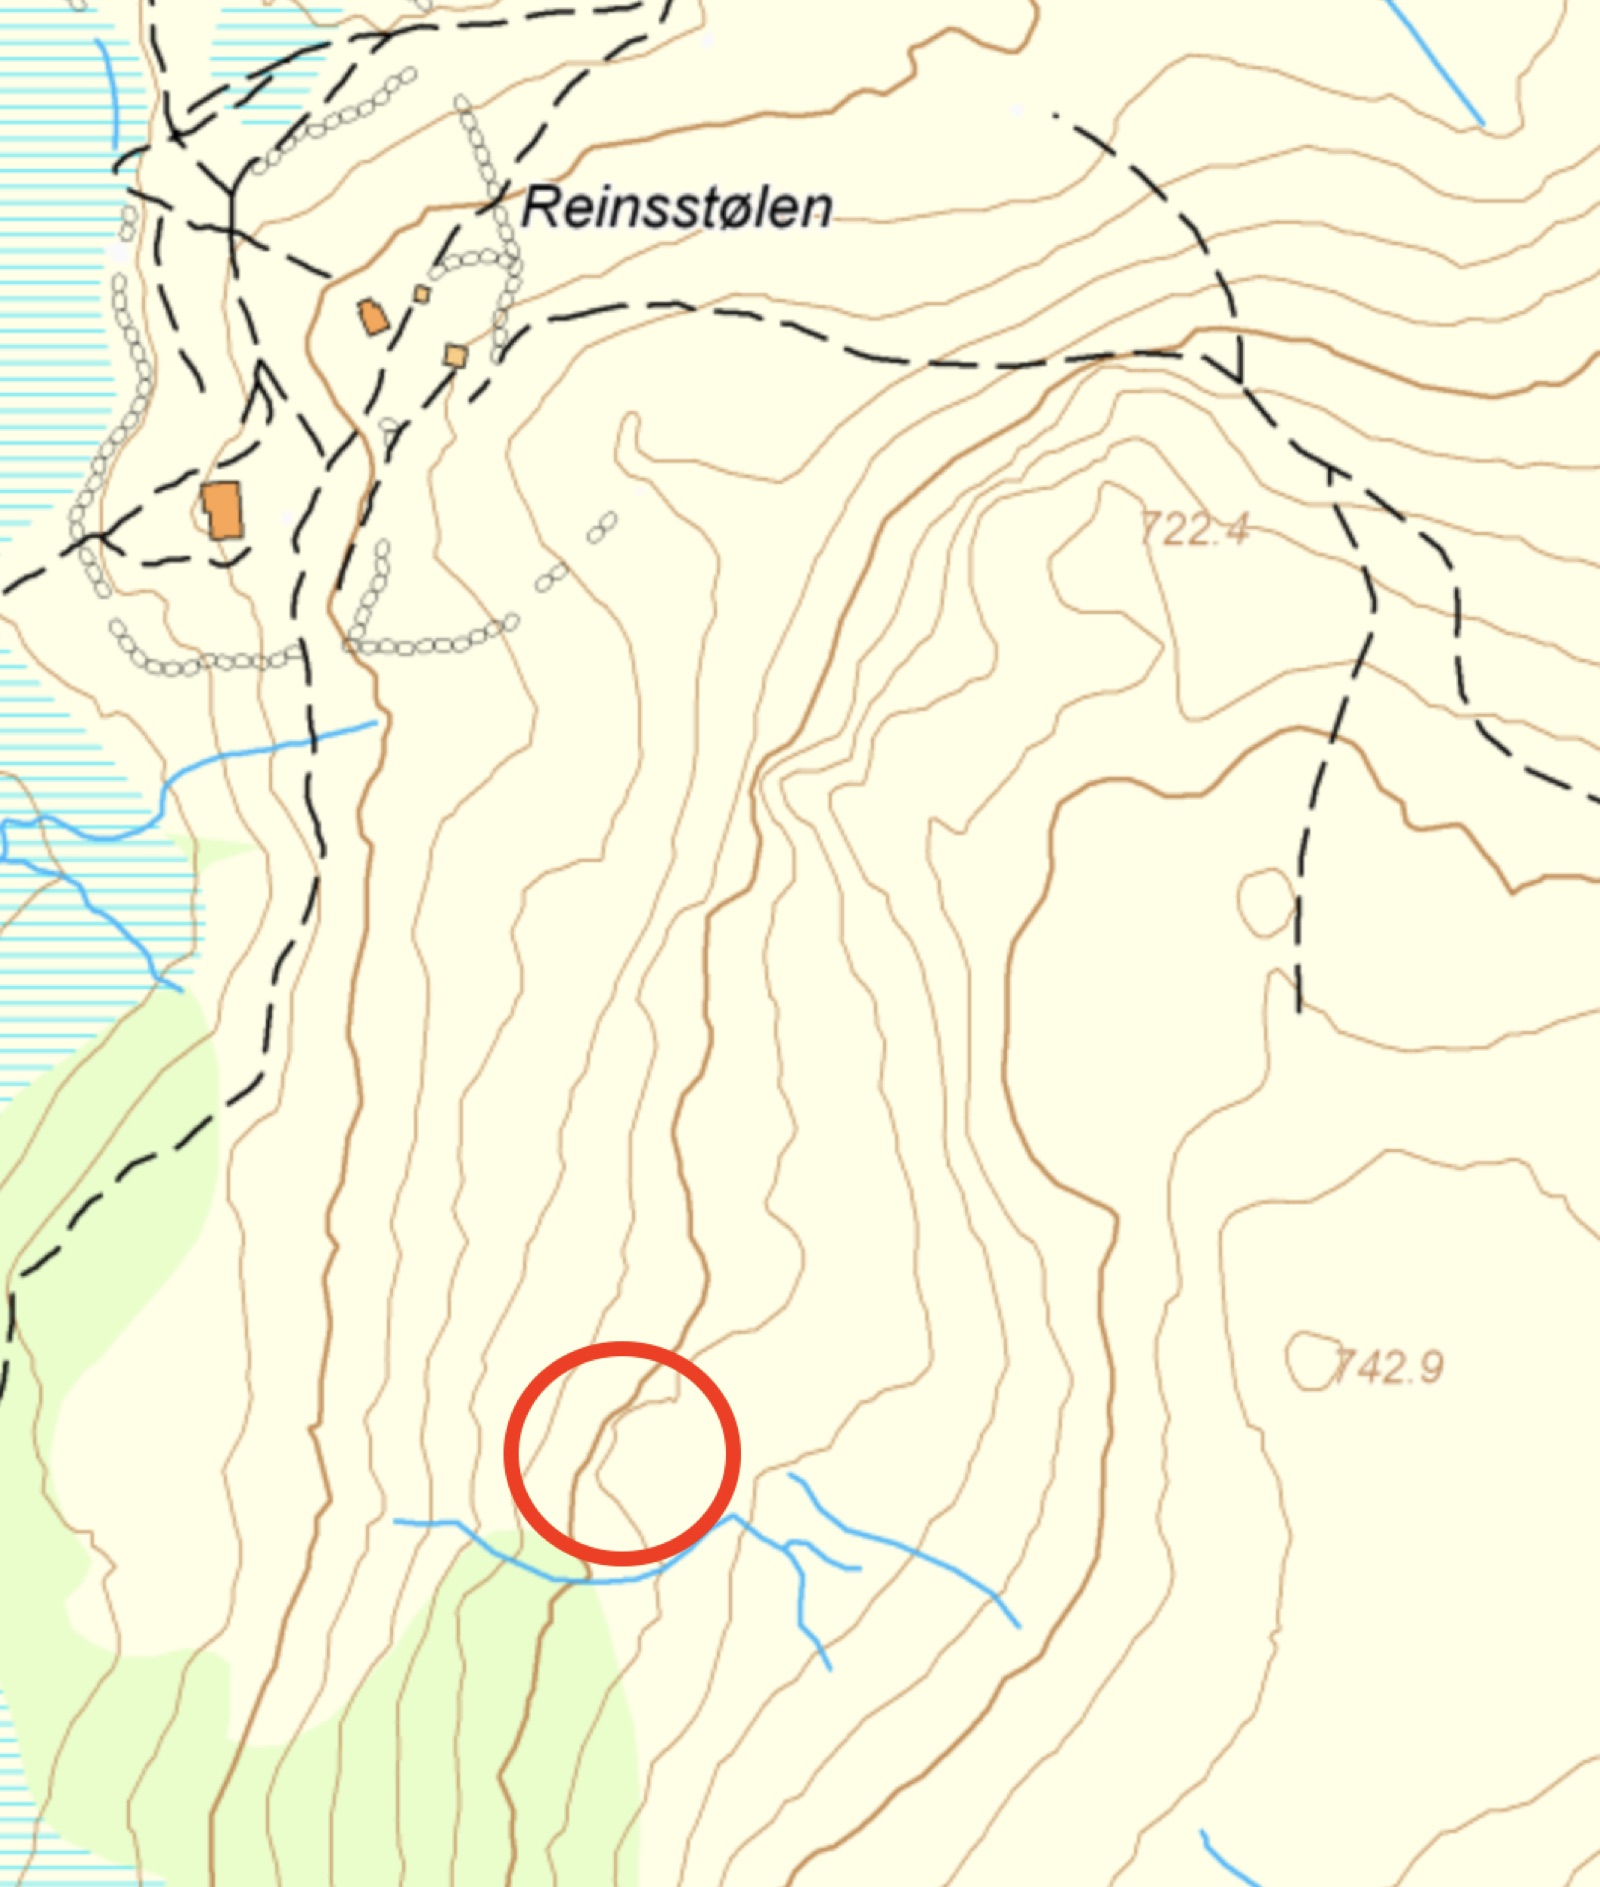
Gorges, narrow gullies, stream valleys, hollows in the terrain and abrupt transitions we can often see on the map before we set out. Cornices and cliffs are also easy to recognise on the map – brown and dark-red colour on the steepness map.
See this map section and/or the image:
Image 16: The red arrow shows the prevailing wind direction for the area. Cornices will form in the area north/east of the red/brown colour for steepness on the map. Map base: NVE Temakart
The transition between trees and forest we often see during trip planning: a transition from green to another colour on the map. While out on a trip, it is important to keep in mind that trees can cause great harm if an avalanche carries you down into this terrain. Rocks and crags are not always so easy to see on the map. We have to make an assessment of this when we reach the area and in the individual slopes. Ask yourself the question: if an avalanche releases above me now, what could the consequences of that be? If we see that we could hit rocks and fall over crags, we should reconsider the route choice.
Cliffs
Note that some cliffs under 20 metres do not show on hiking maps with a 20-metre contour interval.
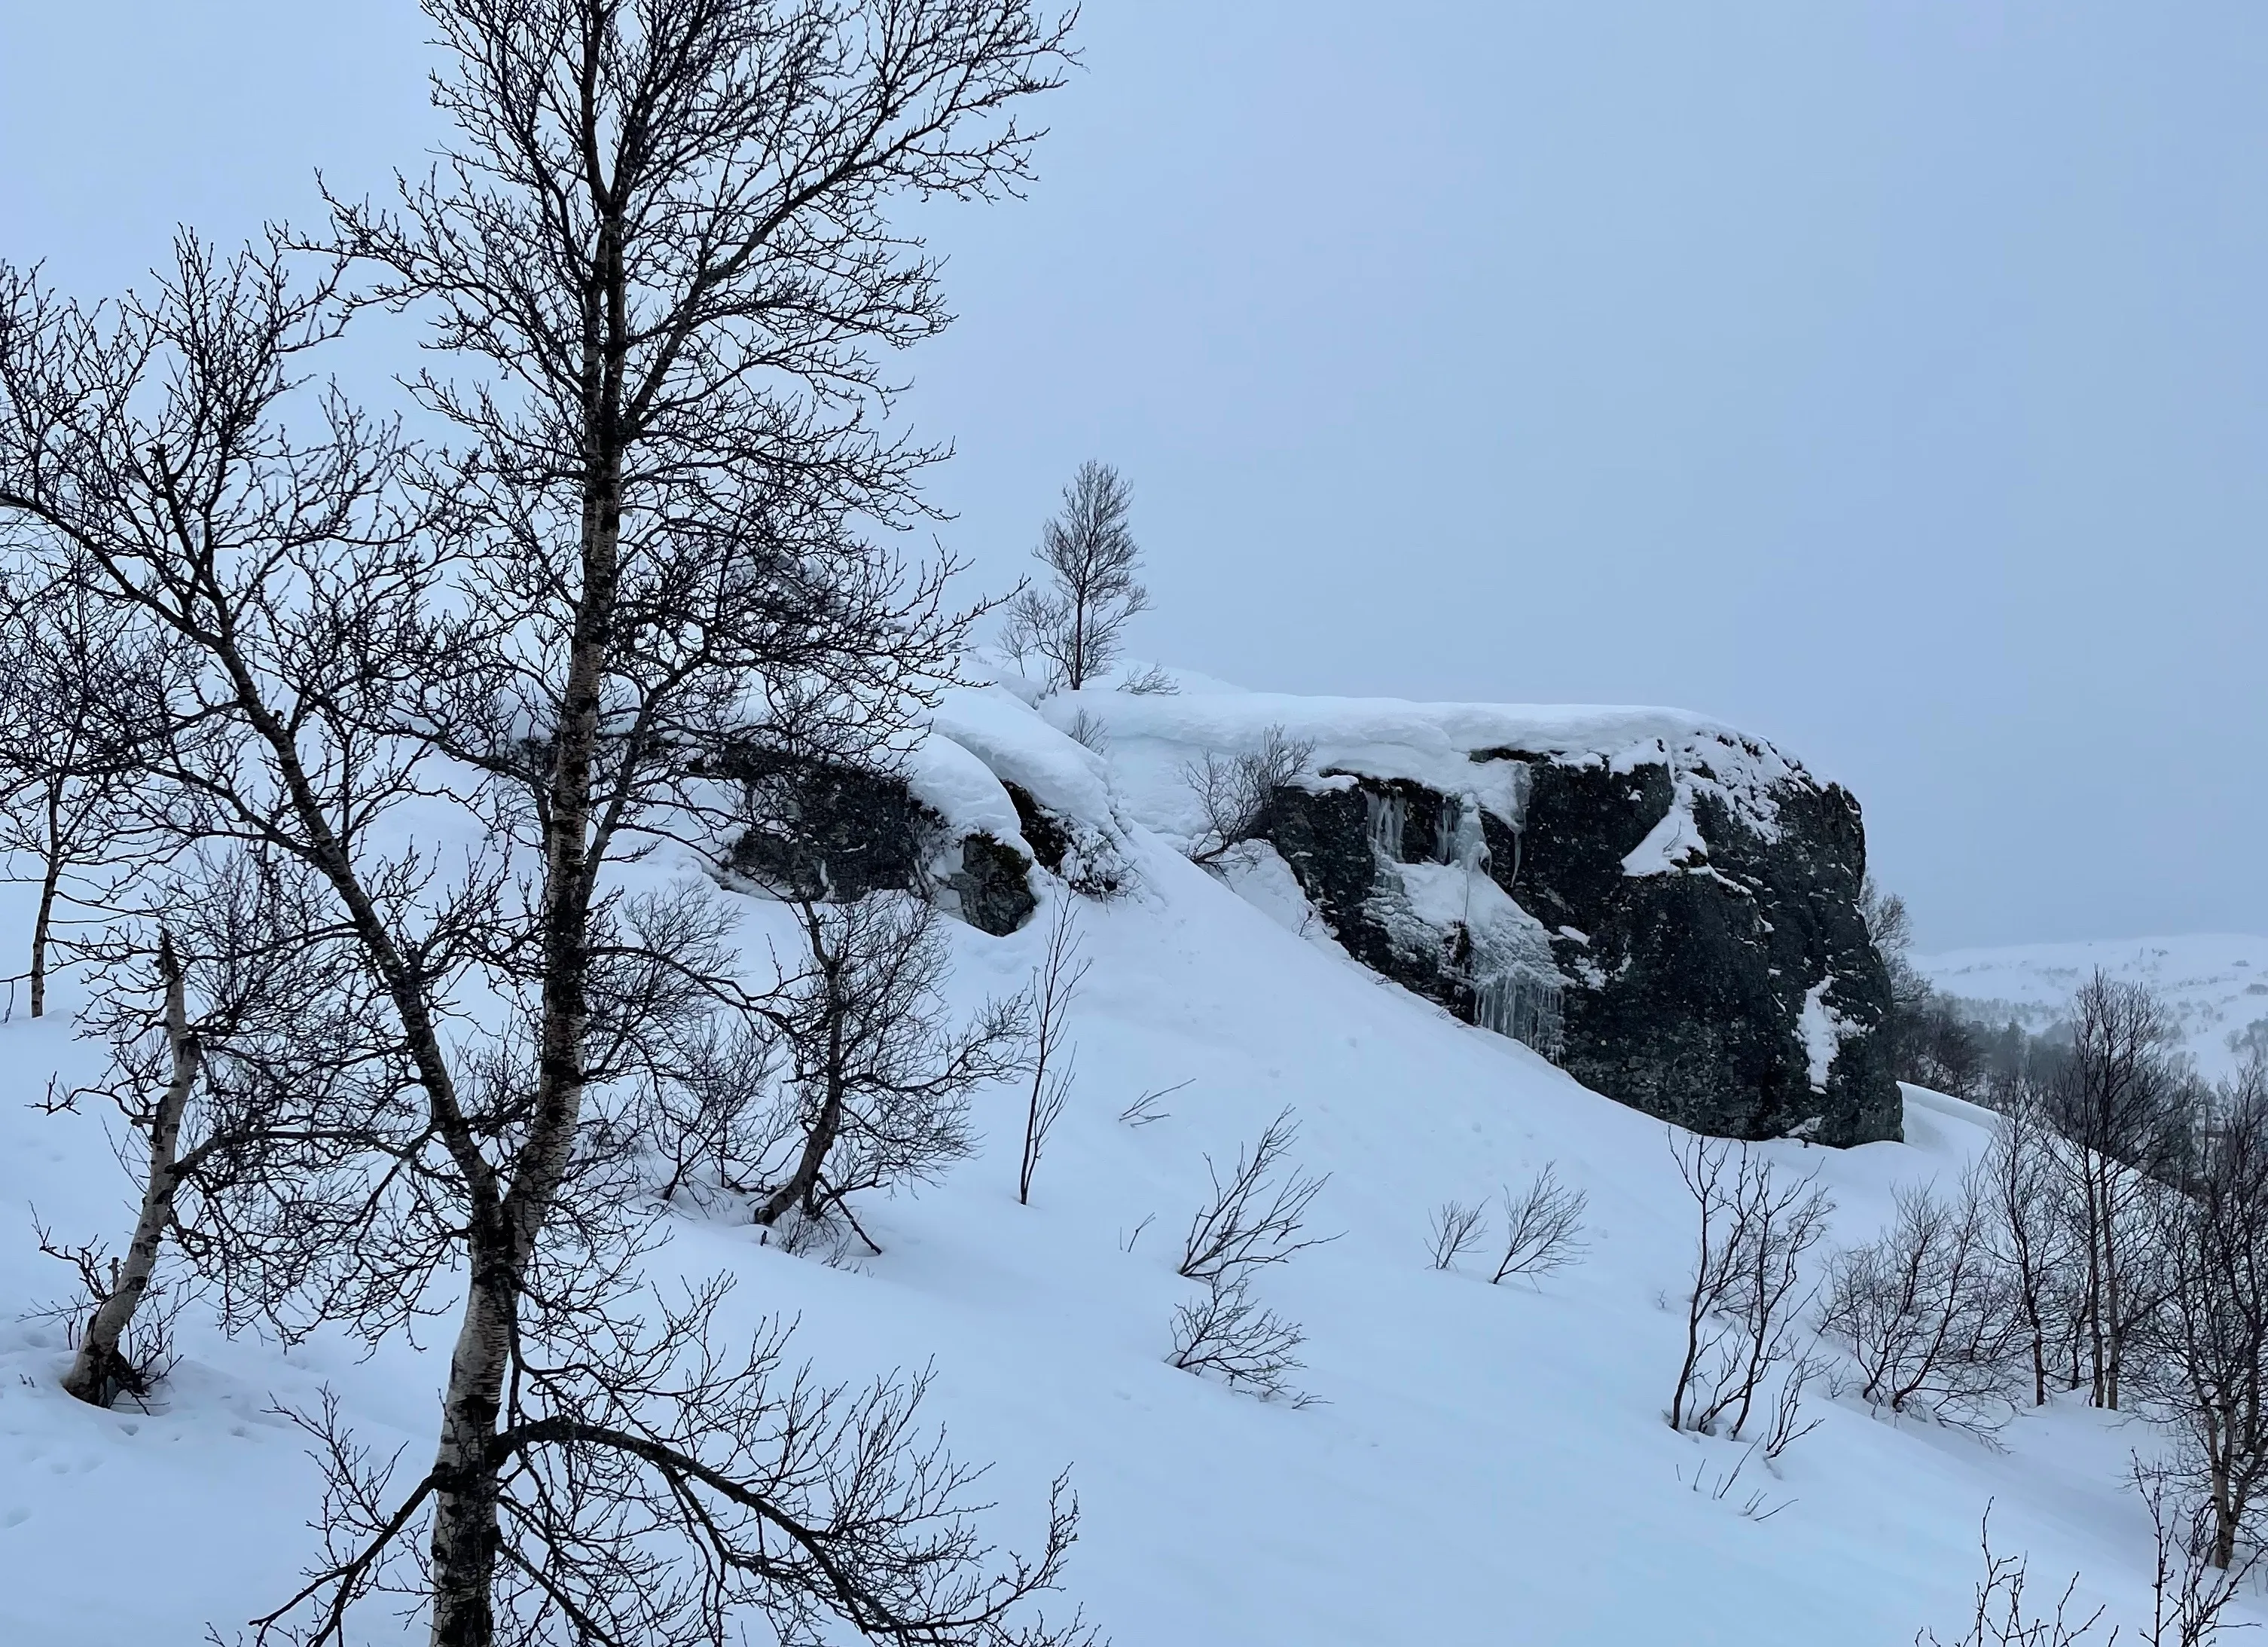
Photo: Gina Wigestrand, Snuitide
A hiking map at a scale of 1:50 000 shows no sign of a cliff. This is because the terrain above and below the cliff has a relatively even slope. Map: norgeskart.no
By zooming in on digital maps such as norgeskart.no we can get a larger scale and more detail. Here the cliff suddenly appears. Map: norgeskart.no
Cornice
Varsom.no - Cornices - beautiful, but dangerous
If we know the area we are going to travel in, the cornice will most often be on the opposite compass direction to the prevailing wind direction (where wind and precipitation most often come from in your area). On Vestlandet (western Norway), wind and precipitation often come from the north-west, west or south-west. In these areas, cornices will often form on the north-easterly or northerly compass direction. We can find this out by asking people who live in the area.
A group moving close to a cornice. Photo: Birgit Rustad, varsom.no
In the image you can see some rocks on the right side of the mountain ridge, while the cornice lies on the left side. Here the wind has blown from the right in the image, carrying snow towards the left. The snow has collected on the left side of the ridge and formed a cornice. You can also see cracks in the cornice, between the group and the cornice’s outer edge. The crack will grow in extent over time and the cornice will eventually break off. Always keep a good distance from cornices.
Terrain form
Many small terrain formations are often hard to see on a map. But if we study the map closely before a trip, we can often see what the terrain will look like:
Image 17: Terrain formations on the map. Map base: NVE Temakart
If we study the map and imagine that we are going up onto Kambafjellet, we will see that by the rivers the contour lines are shaped like a ˄ (sour mouth); this indicates a depression in the terrain. If we look at the right side of Kupelvi (east of Kupelvi), we see U-shapes (smiling mouth). This indicates a ridge formation. If we go further right (east of Kupelvi and the ridge), we see that the contour lines lie relatively evenly, and this indicates even terrain formation without too many irregularities in the terrain. If we move our gaze towards Kambagrovi (further east on the map), we see that there are many “messy” contour lines. This indicates many small terrain formations and “messy” terrain.
In the terrain we can often recognise this as concave (depression) and convex (ridge, rise) terrain formations.
Such terrain formations we can often recognise on the map (image 17), and out in the terrain they are many times easy to recognise (image 18). What we should be aware of is that convex terrain formations will have tensile stresses (gravity), and avalanches often release in these places if it is steep enough, 30 degrees or more. Examples of convex terrain formations are a mountain ridge or a bump in the terrain. Examples of concave terrain formations are stream valleys or small hollows in the terrain. We often think that concave terrain formations are safe and support the snow on the sides, but that does not always hold. If there are persistent weak or weak layers in the snow, we can remotely trigger avalanches by loading these areas. We will come back to this in more detail later.
Forest
The tree line varies depending on where you are in Norway. On the map, forest is marked in green. White colour on the map is terrain that is above the tree line. If we do not know the area we are going to travel in, and we know we will be travelling in forest, it can be wise to ask local people about what the forest is like in the area before we set out. Old avalanches can tell you a lot about run-out zones in the terrain you are in.
Forest has an avalanche-inhibiting effect when it stands so dense that it is hard to ski there, and the diameter of the tree trunk is equivalent to the thigh of an adult man.
Ask the questions:
- Does our trip go above or below the tree line? Most often a mix of these two. Investigate the density of the forest before the trip.
- Do you see signs of typical avalanche-affected forest (bent trees) and/or avalanche paths (few or no trees)?
Image 19: Remains of old avalanches, avalanche path. Photo: Varsom.no
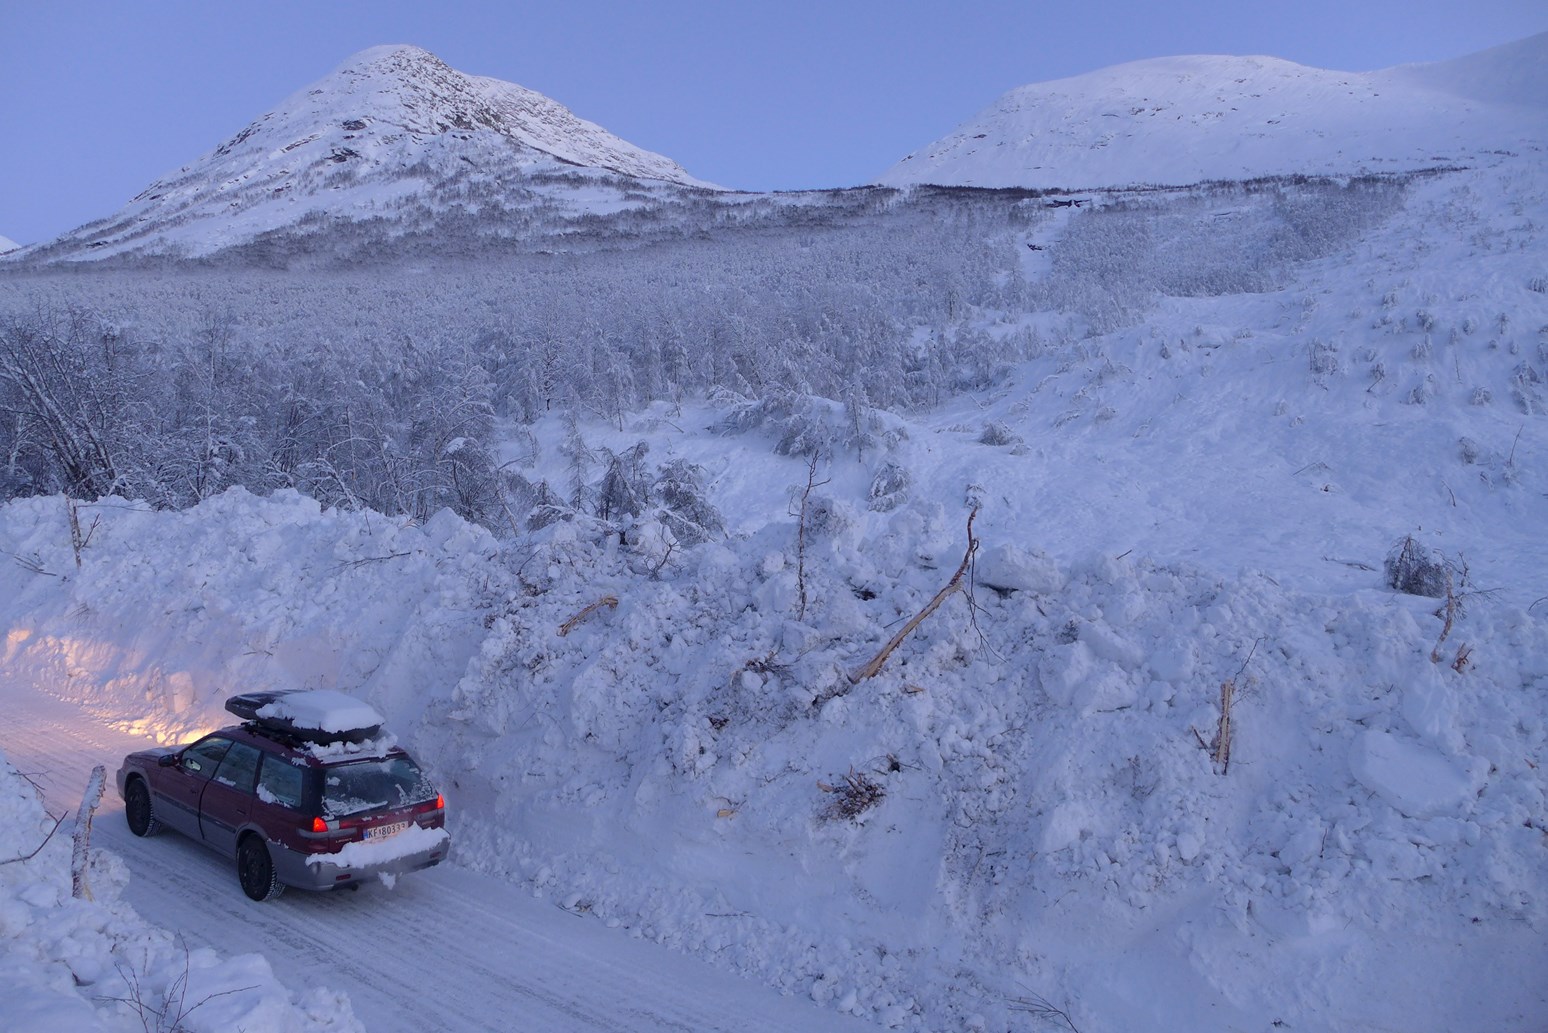
Image 20: Scattered forest, not avalanche-inhibiting. Photo: Varsom.no
Exposure
Exposure means to expose, and is often used in the sense of exposing to danger (Ahlsen, 2020). As long as you stay away from avalanche terrain, exposure time is not relevant. If, however, you have to cross an area where avalanches can occur, it is important to spend as little time as possible in this area.
Look at the image below:
Check on the map, where can we eat lunch/stay overnight, and where should we move quickly past? We are going from Gunvordalsstølen (east on the map) to Reset (west on the map)
Image 21: Varying degrees of exposure. Map base: NVE Temakart
Route choice
We often talk about “safe” route choices. That means choosing a route that does not expose us to unnecessary danger. If you plan a route where we avoid avalanche terrain, you have made a safe route choice. In some places it is not possible to avoid avalanche terrain. Then you have to consider whether you should go somewhere else.
Image 22: Map section of Blåfjell in Sogndalsdalen (top left on the map). Map base: NVE Temakart
Imagine that you are going into this area, and you want to do this safely.
Can you see the various possibilities for making a safe or unsafe route choice?
Remember that the blue marking on the map is run-out zones, and the colour codes are potential release areas.
Next steps
- Avalanches — the hub — overview
- The snowpack — from terrain to snow layers
- The weather — the third corner of the triangle
- The human factor — decisions in avalanche terrain
- Turning back in good time — assessment skill
Learn more
- Varsom — avalanche forecast — regional avalanche warning and the avalanche school
- NVE steepness map — steepness ≥30°
- NGI — avalanches — research
- Norsk Fjellsportforum — course standard
Text
- Linda Hallandvik, Snuitide (2022)
- Where not otherwise stated, all images and films come from Varsom.no’s website.