Gear
Avalanche transceiver
A transmit/receive unit is mandatory in avalanche terrain. The three-antenna standard, batteries and reading them in the cold, where to carry it, and why the kit is worthless without practice.
An avalanche transceiver (also called a transceiver, a transmit/receive unit, or simply a searcher) is a tiny radio that everyone in a group carries on the body. In transmit mode it gives out a standardised signal at 457 kHz. If someone is caught in an avalanche and ends up buried under the snow, the others in the group can switch their own transceivers over to receive mode and use the signal to locate the person quickly.
The three-antenna standard
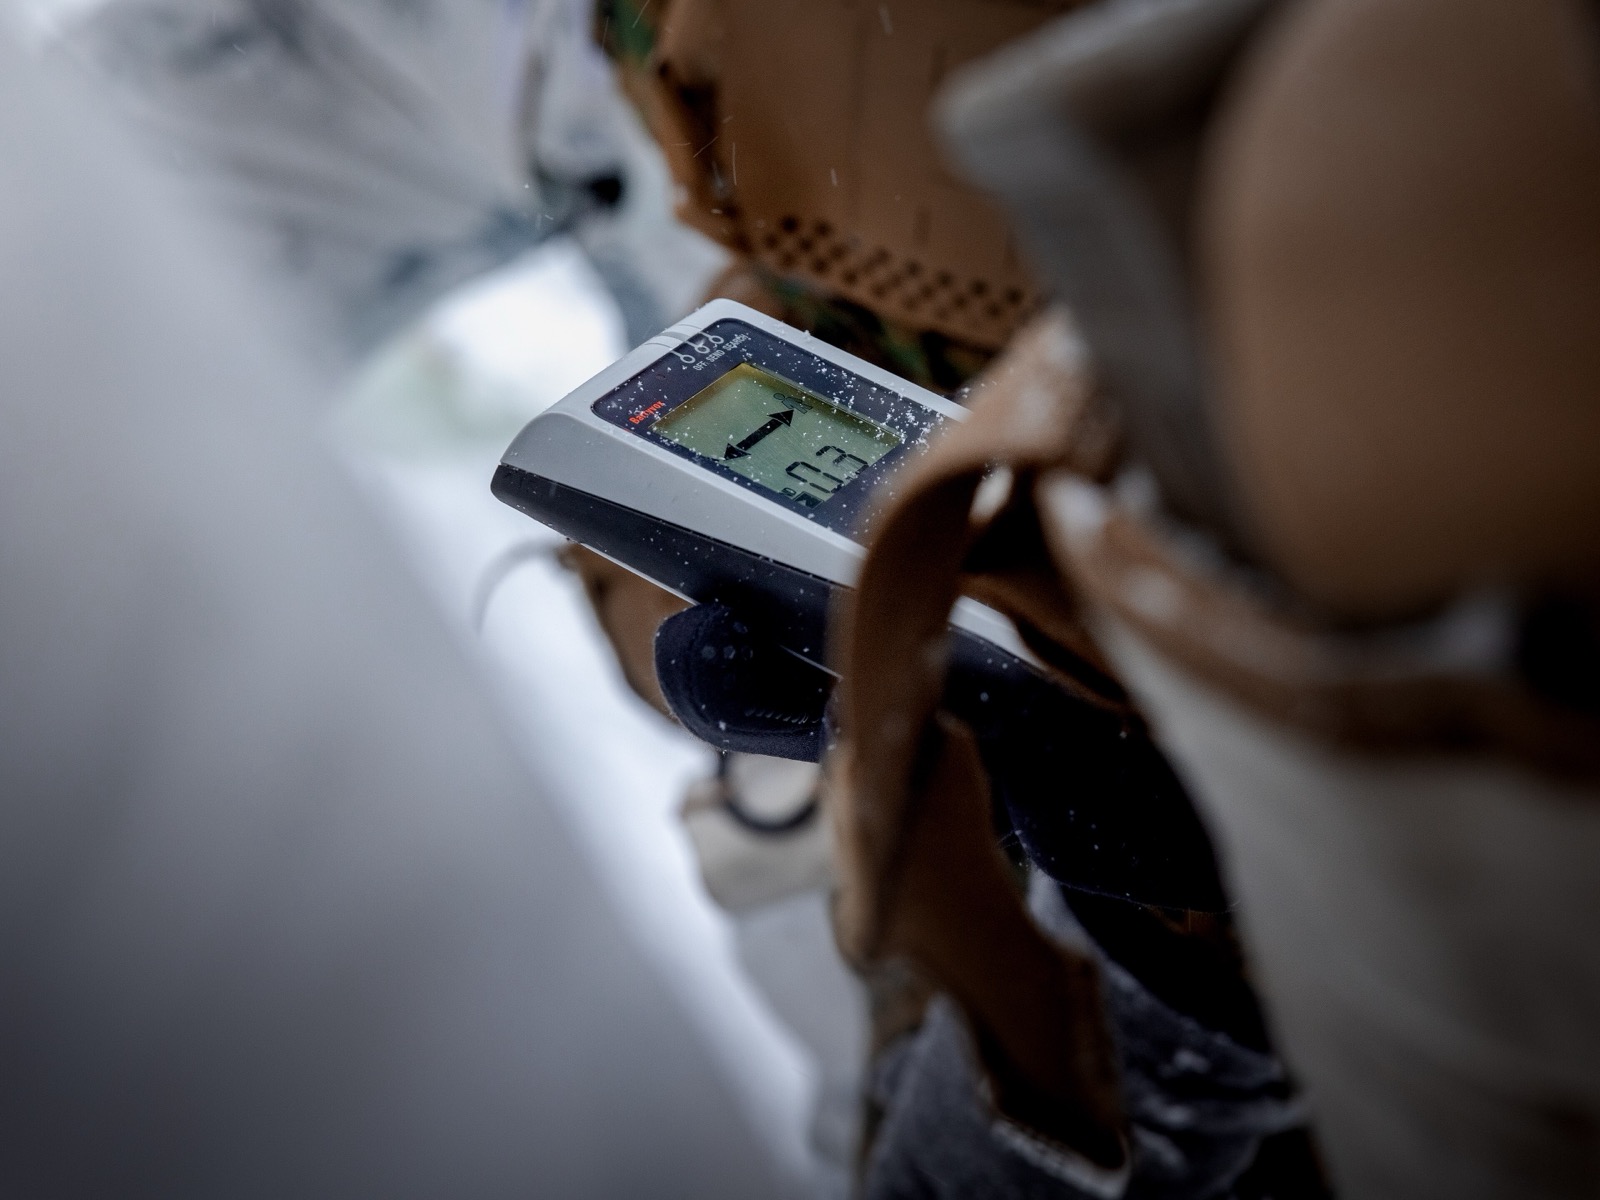
Every modern avalanche transceiver has three antennas on different axes. This lets the transceiver show both direction, distance and depth to the signal source — regardless of how the buried person is oriented under the snow. Older one- and two-antenna models can locate, but give a less precise direction during fine search and require more experience.
To make sense today, an avalanche transceiver should:
- Have three antennas
- Have a digital user interface with a clear distance and direction display
- Support multi-burial (marking an already-found person when several are buried)
- Have auto-revert (automatically returns to transmit mode after a period without movement, so that you yourself can be found if you are caught by a secondary avalanche)
Classic manufacturers with models that meet these requirements: Mammut Barryvox / Barryvox S, Black Diamond Recon / Guide BT, BCA Tracker S / Tracker 4, ARVA Neo / Evo, Pieps Pro BT.
Batteries and reading them in the cold
Most avalanche transceivers use AA alkaline batteries (3 of them). This is a deliberate choice: alkaline batteries have a steady voltage drop during discharge, so the transceiver can show an accurate battery level. Lithium batteries (single-use) give longer running time and better performance in the cold — but not all transceivers accept lithium, because the voltage profile is different.
Check the manufacturer’s recommendation. Never use rechargeable NiMH batteries unless the manufacturer explicitly approves it — the voltage is too low.
In the cold, alkaline batteries lose 30–50% of their stated capacity at −15 °C. Change the batteries when the remaining level is below 50% for trip use in the winter half of the year. On warm days you can go lower before changing.
Check the battery level before every trip — the transceiver shows this automatically at start-up. Note down the date of the last battery change; set a fixed interval (typically one season, or when it goes below 50%).
Where and how to carry it
On the body, under the outermost layer of clothing. Never in the pack — the pack can be torn off in an avalanche, and then you have no transmitter. The standard placement is either:
- In a dedicated harness that comes with the transceiver (chest and hip strap)
- In a pocket of the innermost or middle layer with a cord or carabiner attached to your clothing
The transceiver should be switched on when you set out on a trip, not when you feel it “might get avalanche-prone”. Switch it off when you leave the terrain on the way home.
Beep test before every trip
The standard procedure when you start a trip in avalanche terrain:
- Everyone switches their transceiver to transmit mode
- One person walks a little away (10–20 metres) and sets their own transceiver to receive mode
- The others pass this person one by one — each transceiver should beep and show a distance within the expected range (typically 10–60 metres)
- When everyone has been checked, all are set back to transmit mode
The whole exercise takes 2–3 minutes. It catches faults with batteries, out-of-function transceivers, and people who have forgotten to switch on. It is the simplest and most important safety habit in ski touring.
Search procedure — briefly
Professional avalanche-search training is outside the scope of this article. The main phases are:
- Signal search — walk in a coarse zigzag pattern over the avalanche area until the transceiver picks up a signal (typically 40–60 metres of range)
- Coarse search — follow the arrow and the distance display down towards the source (move quickly, down to about 5 metres’ distance)
- Fine search — slower pace, hold the transceiver close to the snow, find the point with the lowest distance
- Probing — use an avalanche probe to locate the person’s exact position
- Digging — digging is often the most time-consuming phase and requires its own technique
Time target: the whole process from observing the avalanche to the person being freed should be under 15 minutes. After that, the survival statistics fall dramatically.
Bluetooth and software
Many new transceivers have a Bluetooth connection to a mobile app for firmware updates, a practice log and self-test. Useful for those who take this seriously — irritating for those who just want a simple tool.
Firmware updates can fix faults and improve the multi-burial algorithm. Check the manufacturer’s site each season.
Maintenance
Dry the transceiver after wet trips. Take out the batteries if it is stored for more than 2–3 months — old alkaline batteries can leak and ruin the contacts.
Beep-check it after the summer, before the first winter trip. If the transceiver behaves unexpectedly (loses signal, shows the wrong direction, the battery life is shorter than expected) — send it for servicing at the dealer. An avalanche transceiver is not something you repair at home.
Text: Snuitide (2026), based on documentation from Mammut, BCA, ARVA, and on recommendations from Norges Skiforbund and Norges Røde Kors.