Repair & Maintenance
Tears and holes in tent fabric and hammocks
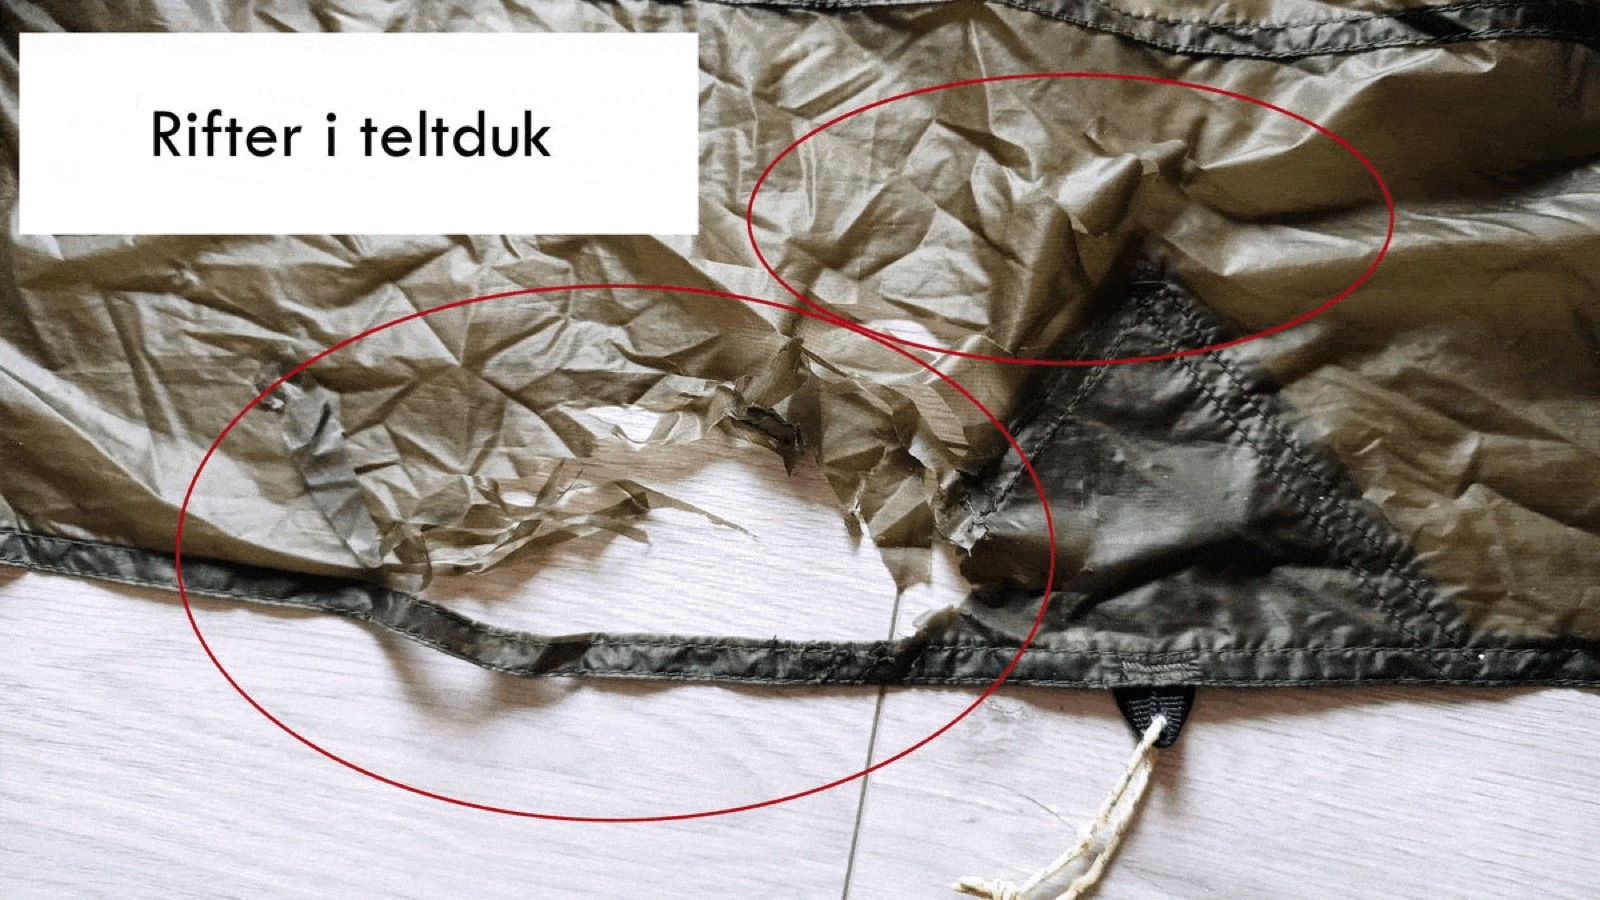
A patch on the outside, one on the inside, cutting away the damaged fabric. Here is how to fix tears in tent fabric so they become watertight again — without replacing the whole tent.
A tear or a hole in the tent fabric need not mean a new tent. With two patches of new tent fabric — one on the outside and one on the inside — plus a little seam sealing, the repair can be watertight and durable.
Materials
- New tent fabric — from an old tent or bought by the metre (Outnorth, sports shops, fabric shop)
- Sewing thread — strong, preferably polyester
- Sewing machine with a thin needle (60 or 70, max 90)
- Clothes pegs to hold the fabric (not pins — they make holes that leak)
- Seam sealing (SIL coating or PU coating, depending on the type of tent)
How to do it
1. Preparation
Make plenty of room on the table — the whole tent should lie there so it does not hang over the edge and pull at the fabric while you sew.
2. Make a template
- Find a piece of transparent plastic or baking paper
- Make a template that is at least 4 cm larger than the damage in every direction
- Cut out 2 patches of new tent fabric — one for the outside, one for the inside
- Mark the patches — tent fabric usually has an outer and an inner side (the outer side has a thicker watertight coating). Mark it with a felt-tip pen or pencil.
3. Fold the edges
- Fold the edge of the patch 1 cm inwards
- Hold it with clothes pegs, not pins
4. Sew the first patch on the outside
- Lay the patch over the damage, at least 2 cm clearance from all damage
- Mark the position with a pencil
- Use a thin needle — 60 or 70. A thinner needle = a smaller hole = a more watertight seam.
- Lay the tent under the sewing machine and check that it is not doubled over
- Straight stitch, stitch length 3, sew back and forth at the corners
- At the corners: stop with the needle down in the fabric, lift the presser foot, turn the tent, continue
5. Cut away the damage
Once the first patch is sewn on, turn the tent over and cut away the damaged fabric from the inside. Leave a 2–3 cm edge inside the seam.
6. Patch no. 2 on the inside
Sew the second patch on the inside, in exactly the same place. The inside patch relieves the area and reinforces the repair.
7. Seal the seams
Even with a thin needle there will be a few small holes after the sewing. Seal them with the right seam sealing:
- SIL coating for siliconised nylon tents (Hilleberg and others)
- PU coating for PU-coated tent fabric (most tents)
For a hammock
The same process, but:
- Different materials — hammock fabric is often tightly woven nylon without a watertight coating
- Less critical to make it watertight — focus on strength
- Stronger thread — hammocks carry the whole body weight
- Preferably a double seam for extra security
Tips
- Wrap up the roof while you work — muddy weight on the sewing table damages the sewing machine
- Test the repair in the shower before your next trip — hold the patch under a strong shower jet for 5 minutes and check whether the water gets through
- Re-proofing the flysheet after a repair — silicone or PU spray gives a fresh, even coating
Back to Repair → · Gluing holes and tears in outdoor gear → · Tents →
Text: Lars Peters and Snuitide (2022), revised 2026.