Food
Dry your own trail food
Trail food can be bought over the counter, but if you are heading out on a long trip, it is better and more economical to make and dry your own provisions.
- Contents
Home-made trail food in three easy steps
!Trail food can be bought over the counter, but if you are heading out on a long trip, it is better and more economical to make and dry your own provisions. Photo: Sindre Thoresen Lønnes, limited reuse
Trail food can be bought over the counter, but if you are heading out on a long trip, it is better and more economical to make and dry your own provisions. Photo: Sindre Thoresen Lønnes, limited reuse
If you are going out walking over a longer period, a quick calculation will show that living on ready meals becomes rather expensive. And if you also care about what you eat, it can soon become difficult too. That is why I can recommend doing what we did when my brothers and I were heading to Bjørnøya for two months — we got hold of food that had passed its use-by date, prepared and dried it all ourselves.
Along the way we learned just how much you can actually dry, how little it weighs and how little space dried food takes up. The quality is excellent, and we avoided taking in a lot of additives. You can dry most fruit, vegetables and meat. It is best if the food is cut into small pieces and does not contain too much fat. Fat can turn rancid, and that is neither tasty nor healthy.
Experiment with what you like best, or what you have at home. Many vegetables can become a little dry if they have been sitting too long in the fridge and may not look especially appetising, but they are still more than good enough for drying.
Get enough calories
On a long trip you should make sure you bring enough energy (calories). You burn four to five thousand calories during a twenty-four-hour period on a trip. This varies a great deal from person to person, and on a really hard day you can easily burn as much as 10,000–12,000 calories. The body also needs fibre, protein and vitamins.
Good sources are different kinds of meat. Broccoli, carrots, cauliflower and swede are examples of nutritious vegetables, and if you add a little onion and sweetcorn, you get a lovely flavour and a colourful meal. Eggs can also be dried, from finely chopped scrambled egg. For dessert and snacks you can dry almost any kind of fruit, and they are also wonderful in your breakfast porridge. In general: use your imagination and make something you think is good. Most things can be dried.
Dry in a machine or oven
Drying food is an ancient preservation technique. In the past, food was dried in the sun, or over the stove inside the house, but now there are good drying ovens that dry the food within a few hours
If you are going to dry your own trail food, you can also use your own oven. Set the oven to 100 degrees and leave the door open. Drying in an ordinary oven takes time, so here it is a matter of being patient. If you are planning to dry larger quantities, you should borrow or invest in a dehydrator, that is, a food-drying machine. This is a cabinet with a heated fan inside. Inside the cabinet there is a set of racks on which the food is placed. They can be regulated to precise temperatures to preserve as much of the food’s nutrition as possible.
 *
*
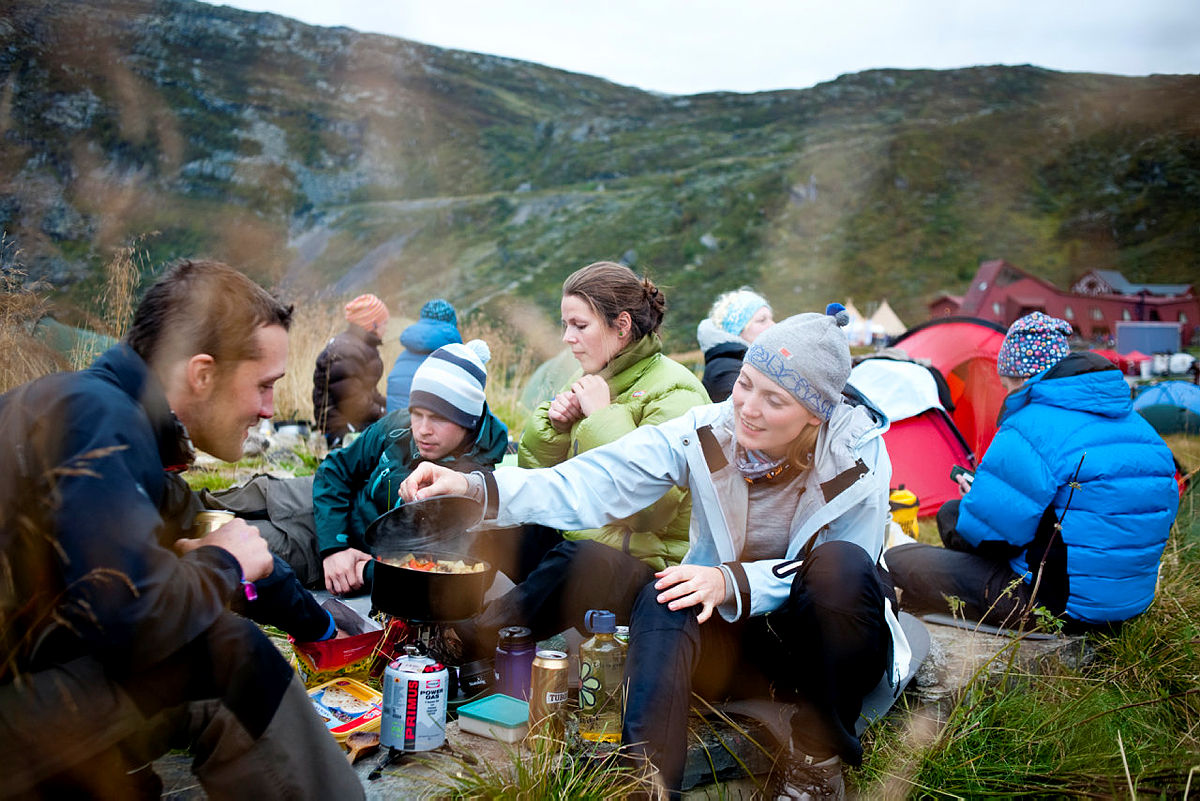
DO IT TOGETHER: When the Wegge brothers were heading to Bjørnøya, they spent several evenings making and drying the trail food together, and at the same time found time to discuss details for the trip. Photo: Inge Wegge, CC-BY-NC-ND
I recommend a machine with the fan placed at the back, blowing the air forwards. That way you get more even drying and can be sure the food becomes completely dry. Some have the fan at the bottom, blowing upwards, but then there will be a slight difference between what you have placed at the bottom and at the top.
How to do it
- Cut the ingredients you are going to dry into equal pieces or slices, no more than 5 mm thick.
- Spread the ingredients out on a rack or baking tray, and dry on a fan setting with the oven door open. Turn and move the pieces along the way for the best possible circulation.
- Cool to room temperature, then pack as airtight as possible in containers with lids or in bags.
- Timing will vary according to the size, quality, fat and water content of the ingredients. They are not done until the ingredients are completely free of moisture.
(Mari Kolbjørnsrud, 2021, https://turmat.no/turtips/tork-ravarene-selv)
Cut all the food into small pieces, preferably no larger than 0.5 cm. Whether they are cubes or strips is up to you, but they should be roughly the same size. Cut away as much of the fat from the meat as you can, and leave the vegetables with as much «end grain» as possible — they dry most where you cut across the fibres.
The food usually has to be treated before it is dried. Meat should be cooked as usual, but it can be cooked at a slightly lower heat and for a longer time, so that it becomes extra dry. Some vegetables can be dried raw, such as onion, peppers, mushrooms and tomato, while others should be heat-treated or blanched. This kills bacteria, and the food becomes softer and dries more easily.
Dry and pack
Spread the food evenly across the trays without making piles or clumps of food. Let the air reach it. Meat is dried for about eight hours at 68 degrees, while vegetables should have a slightly lower temperature. At 41 degrees you preserve more nutrition in fruit and vegetables, but make sure they get enough time in the dryer. If the food is still soft or moist, it should be left longer so that you do not risk bacteria developing.
The food should be packed in airtight bags, ideally with a vacuum sealer. Then it can keep for years. It is up to you whether you want to make complete dishes or pack the ingredients separately. One tip is to make portion packs and add rice, pasta or the like.
The dried food should be left to sit in water for a few hours before being brought to the boil. It then swells back up to virtually its original size and tastes much like the dinner you would have made fresh at home.
Dried meat can be eaten as it is. Seasoned a little during cooking, it is good as a snack and as protein-rich, healthy and filling trail food or a between-meal snack, or it can be used in various dishes. For that, the meat should sit in water for a few hours so it swells. You use the water in the dinner dish.
Dry the ingredients yourself
The following tips are a guide and must be adapted to the ingredients. Experiment!
Temperature and time estimate for drying
Meat: 1–2 twenty-four-hour periods, 70 ℃
Vegetables: 1 twenty-four-hour period, 50 ℃
Mushrooms: 2 twenty-four-hour periods, 50 ℃
Fruit: 1 twenty-four-hour period, 50 ℃
Berries: 2 twenty-four-hour periods of air-drying on a tray before oven-drying for 5 hours, 50 ℃–70 ℃

Photo: *pixabay.com* HEALTHY SNACK: Choose the ingredients you like best of all and dry them — really tasty!
Some rules of thumb and general tips
-
Lean ingredients are better suited to drying than fatty ingredients. Lean ingredients dry faster than fatty ingredients.
-
Dried lean ingredients also normally keep longer than dried fattier ingredients.
-
Remove as much fat as possible from meat, and cook it before drying.
-
Firm vegetables with a low water content should usually be boiled (blanched) before drying.
-
Boil the vegetables until suitably tender in lightly salted water, and transfer to iced water for immediate cooling.
-
Mushrooms that are well suited to drying are, for example, champignon, chanterelle, winter chanterelle, cep and young hedgehog mushroom. Clean and cut into thin slices.
-
Fruit with parts that are not to be eaten, for example skin or core, should be cleaned before drying.
-
Berries can happily be dried whole. Spread them on the baking tray and let them air-dry in the open for 2–3 days before oven-drying at 50–70 °C. Feel free to turn the temperature up gradually over the course of the oven-drying period.
-
Pack the ingredients according to the recipes you are going to make on the trip. Different dried goods can be packed together, but meat should usually be packed separately.
 *
*
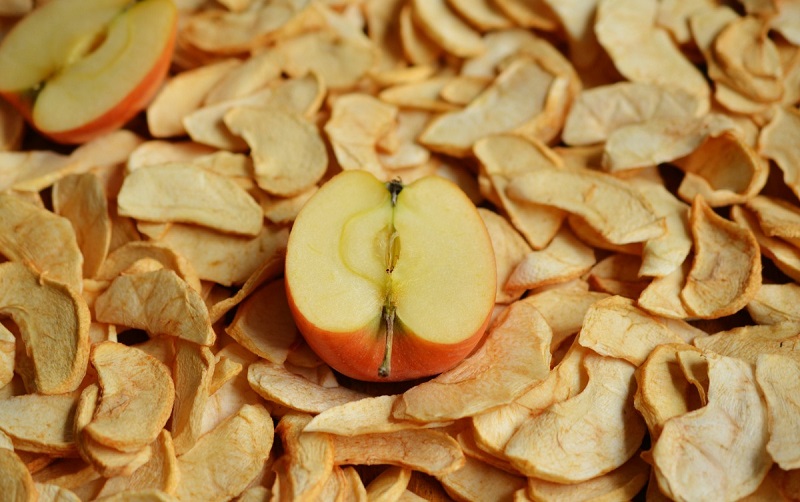
DELICIOUS SNACK: Dried apple is both a healthy and tasty everyday snack. Photo: *pixabay.com*
-
Make a porridge base of rolled oats, salt, cardamom and milk powder. Bring to the boil with water and dried fruit or berries for a flavourful breakfast.
-
Dried fruit is a really tasty snack.
-
Feel free to season fruit before drying: apple slices with cinnamon, for example, taste delicious.
-
The meat can be seasoned well before cooking and drying, and eaten dry as a snack — like American «beef jerky».
-
Dried berries can be baked into bread dough or pancake batter, and add an extra touch to lunch.
-
Once everything has been cut up, dinner could not be simpler to make: boil the dried ingredients in water or stock for about 20 minutes, and add rice, noodles, pasta, couscous or the like at the end.

Photo: *pixabay.com* MEAT: Dried meat can be very good! And perfect trail food.
- Dried mushrooms can be ground in a mill or processor and used as seasoning. Use dried fruit, berries and spices, and blend your own tea.
The information is drawn from the Information Office for Fruit and Vegetables, www.matmerk.no and personal experience. The pictures are from pixabay.com (no attribution required).
Next steps
- Planning your trail food — the pre-trip work
- Cooking on a trip — on the trip itself
- Food and nutrients — energy and calories
- Food on a trip — the hub
Learn more
- Mattilsynet — drinking water and hygiene — food safety outdoors
- Helsedirektoratet — dietary advice — nutrition
- Sopp- og Nyttevekstforbundet — mushrooms and wild plants
- DNT — trail food — recipes and tips